Automated deployment and replacement of Scoring Code in AzureML
Availability information
Automated deployment and replacement of Scoring Code in AzureML is a premium feature. Contact your DataRobot representative or administrator for information on enabling this feature.
Create a DataRobot-managed AzureML prediction environment to deploy DataRobot Scoring Code in AzureML. With DataRobot management enabled, the external AzureML deployment has access to MLOps features, including automatic Scoring Code replacement.
Create an AzureML prediction environment
To deploy a model in AzureML, you first create a custom AzureML prediction environment:
-
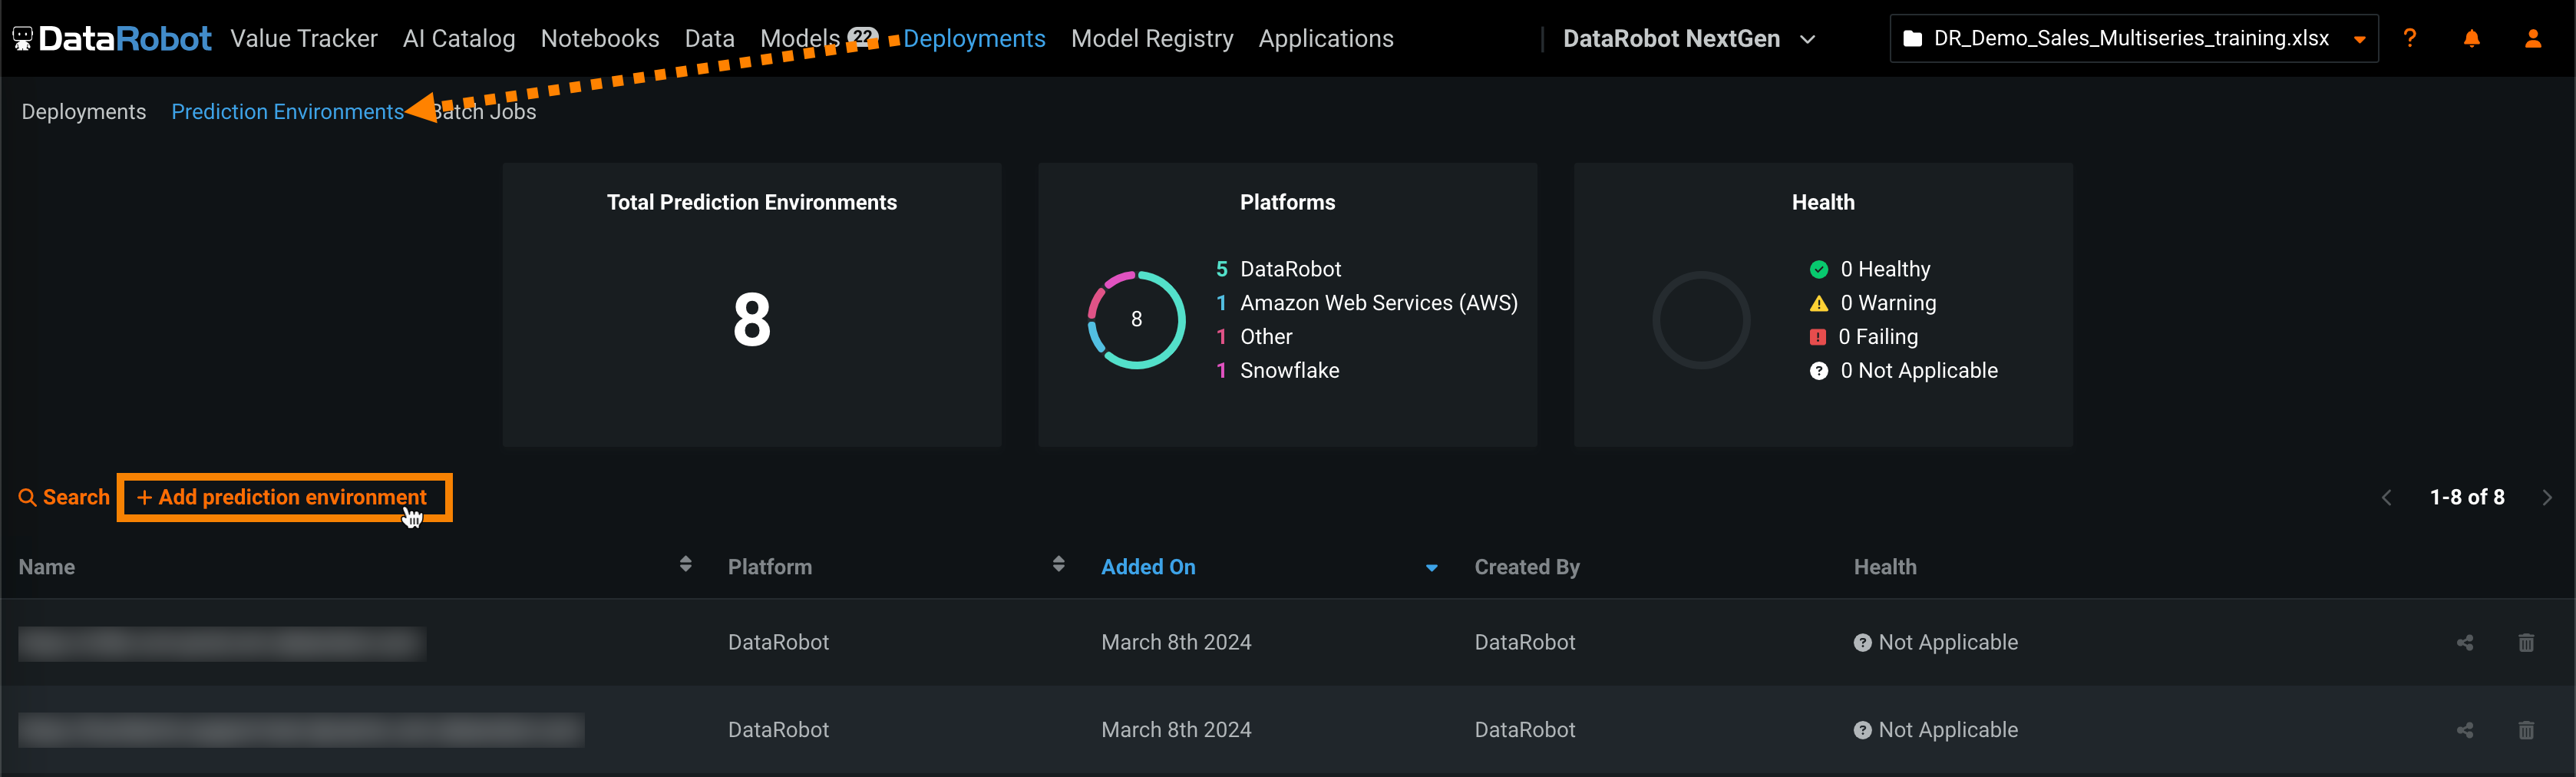
Click Deployments > Prediction Environments and then click Add prediction environment.
-
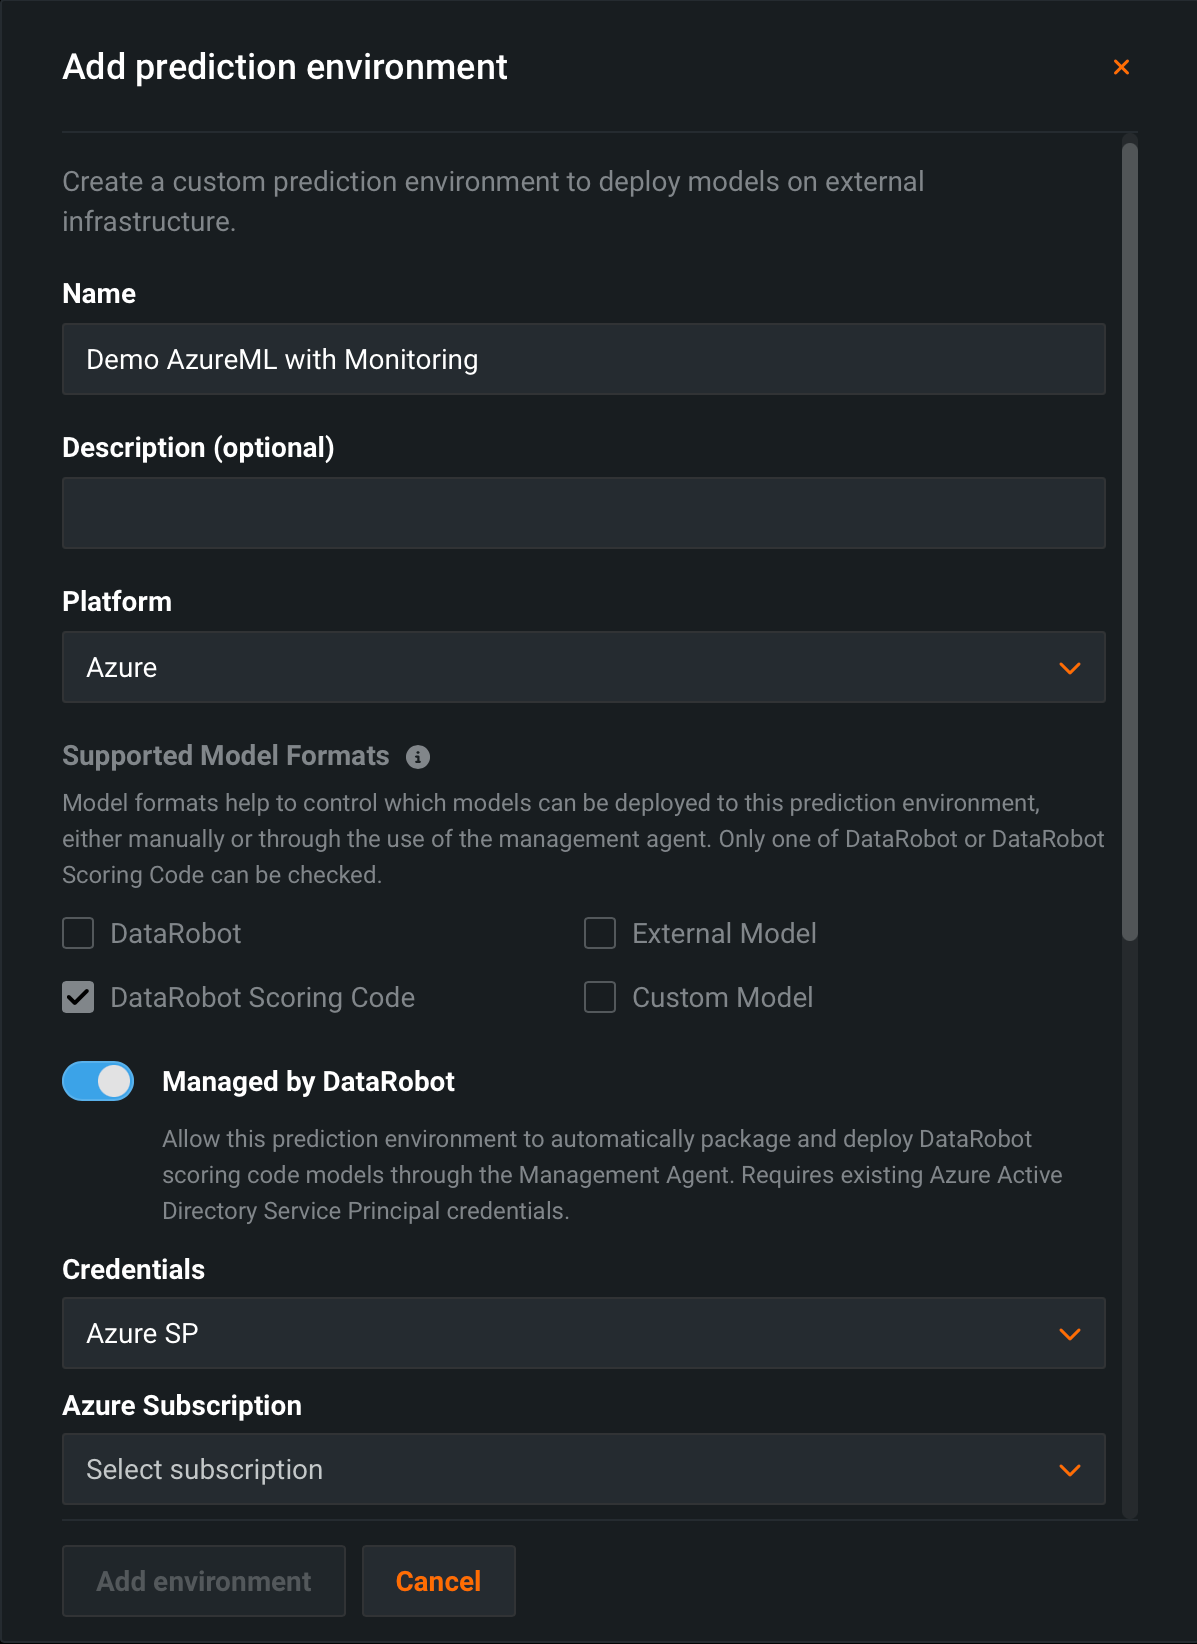
In the Add prediction environment dialog box, configure the prediction environment settings:
-
Enter a descriptive Name and an optional Description of the prediction environment.
-
Select Azure from the Platform drop-down list. The Supported Model Formats settings are automatically set to DataRobot Scoring Code and can't be changed, as this is the only model format supported by AzureML.
-
Enable the Managed by DataRobot setting to allow this prediction environment to automatically package and deploy DataRobot Scoring Code models through the Management Agent.
-
Select the related Azure Service Principal Credentials.
Azure Service Principal credentials required
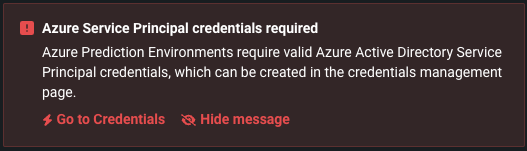
DataRobot management of Scoring Code in AzureML requires existing Azure Service Principal Credentials. If you don't have existing credentials, the Azure Service Principal credentials required alert appears, directing you to Go to Credentials to create Azure Service Principal credentials.
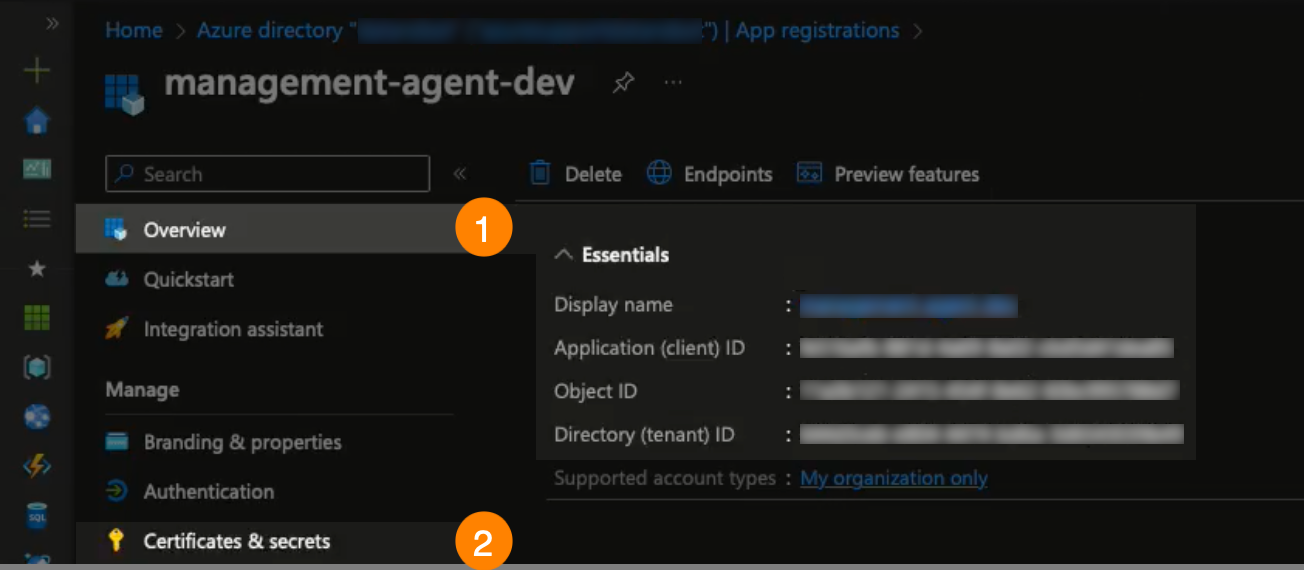
To create the required credentials, for Credential type, select Azure Service Principal. Then, enter a Client ID, Client Secret, Azure Tenant ID, and a Display name. To validate and save the credentials, click Save and sign in.
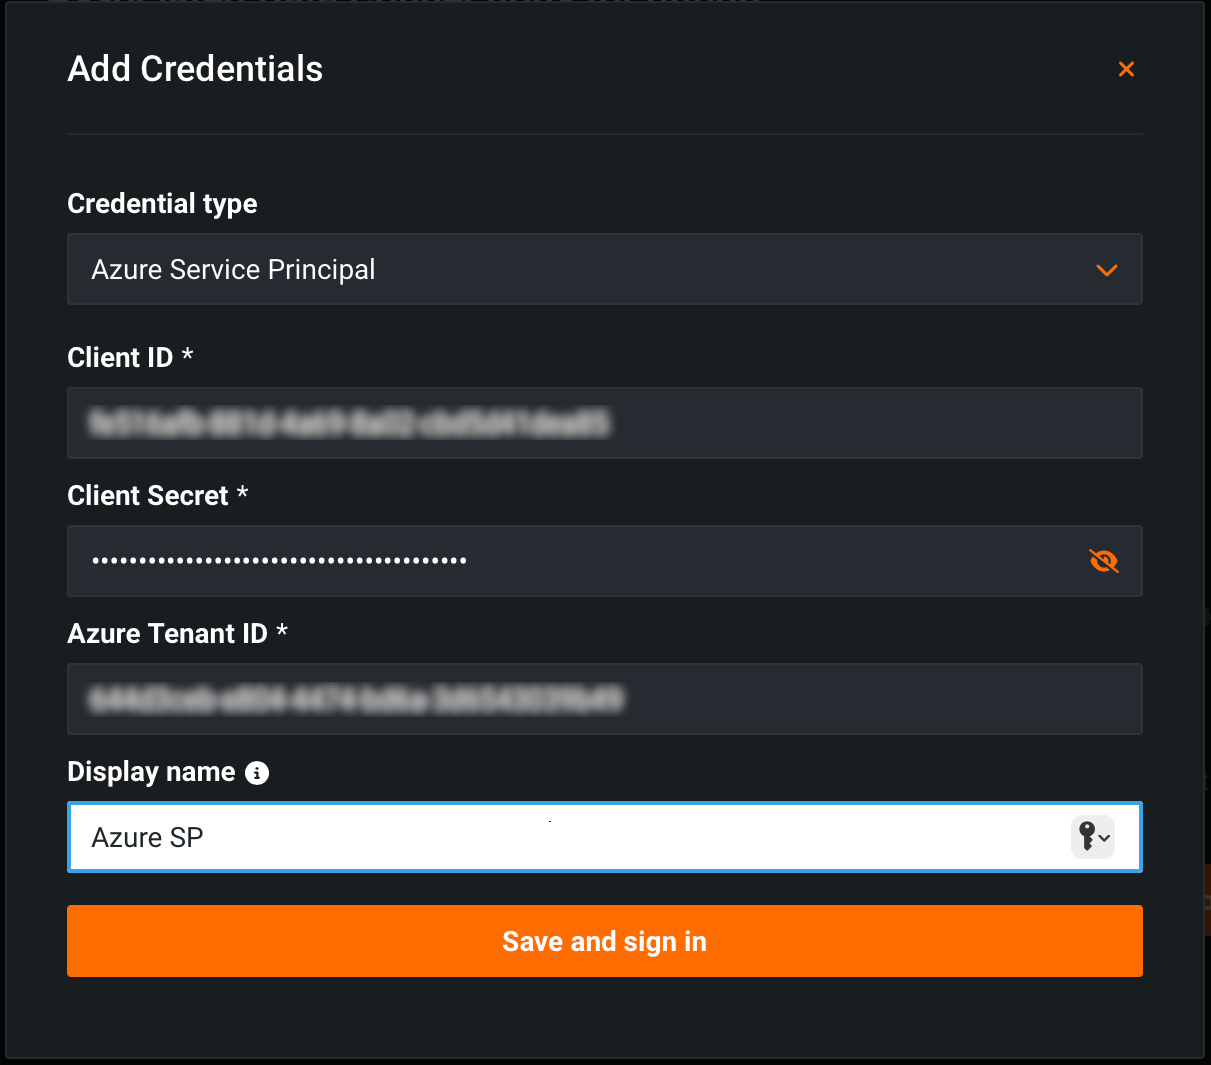
You can find these IDs and the display name on Azure's App registrations > Overview tab (1). You can generate secrets on the App registration > Certificates and secrets tab(2):
-
-
Configure the Azure Subscription, Azure Resource Group, and AzureML Workspace fields accessible using the provided Credentials.
-
(Optional) If you want to connect to and retrieve data from Azure Event Hubs for monitoring, configure the Event Hubs Namespace, Event Hubs Instance, and Managed Identities fields. This requires valid Credentials, an Azure Subscription ID, and an Azure Resource Group.
-
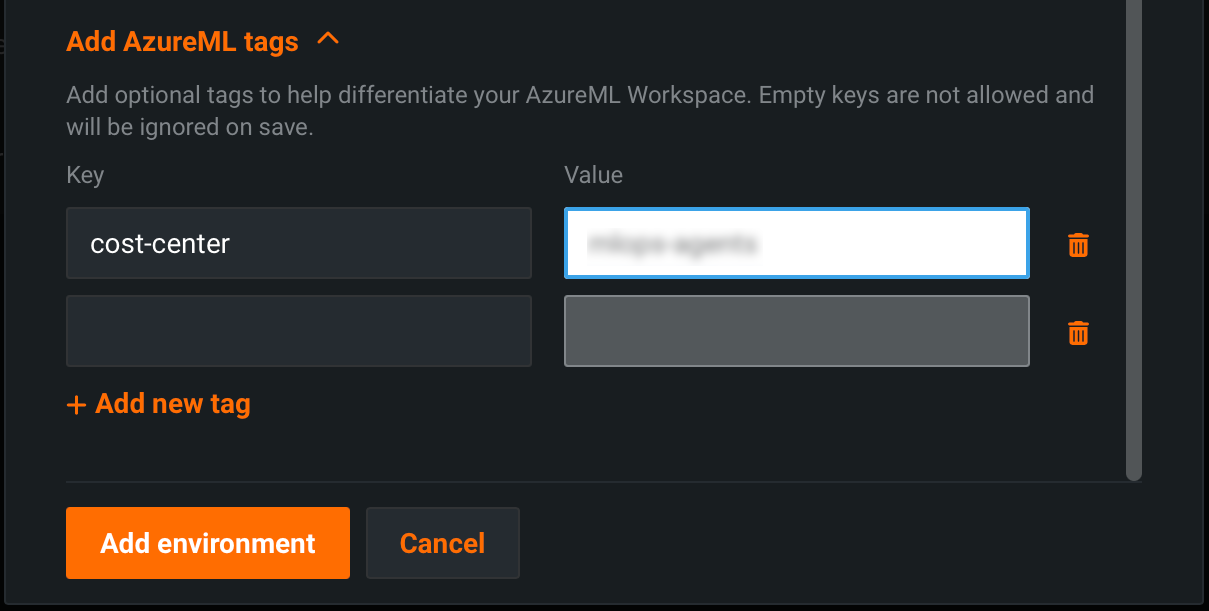
(Optional) If you are using tags for governance and resource management in AzureML, click Add AzureML tags and then + Add new tag to add the required tags to the prediction environment.
-
After you configure the environment settings, click Add environment.
The AzureML environment is now available from the Prediction Environments page.
Deploy a model to the AzureML prediction environment
Once you've created an AzureML prediction environment, you can deploy a model to it:
-
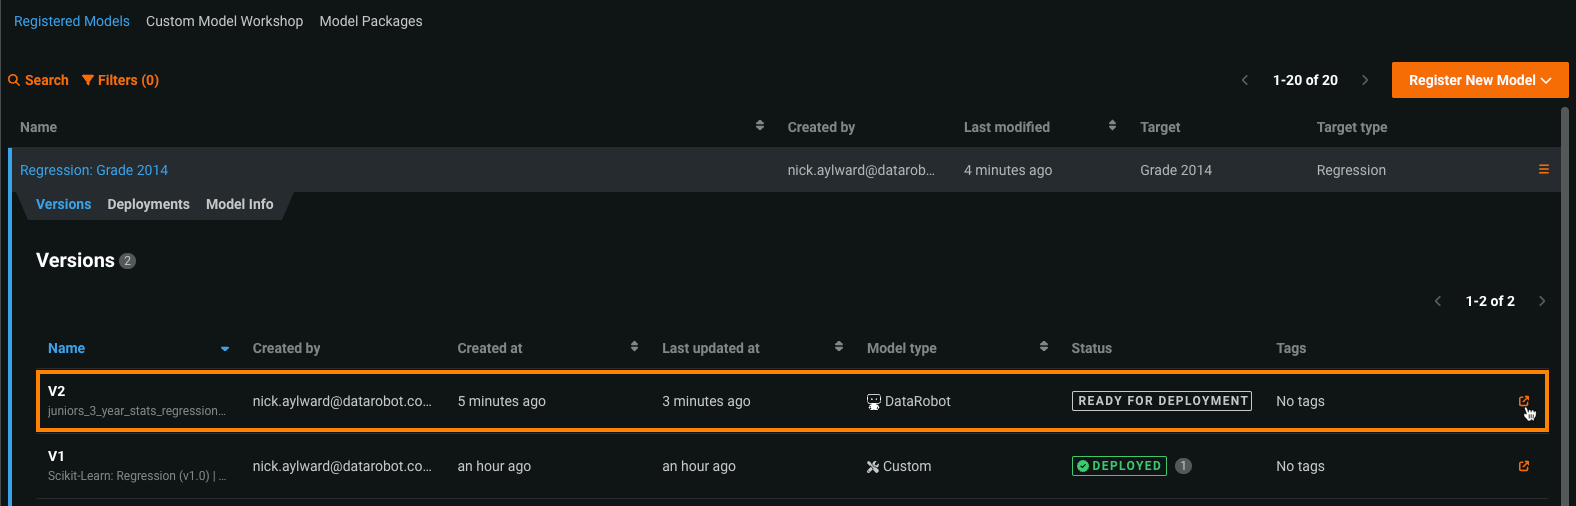
Click Model Registry > Registered Models and select the Scoring Code enabled registered model version you want to deploy to the AzureML prediction environment.
Tip
You can also deploy a model to your AzureML prediction environment from the Deployments > Prediction Environments tab by clicking + Add new deployment in the prediction environment.
-
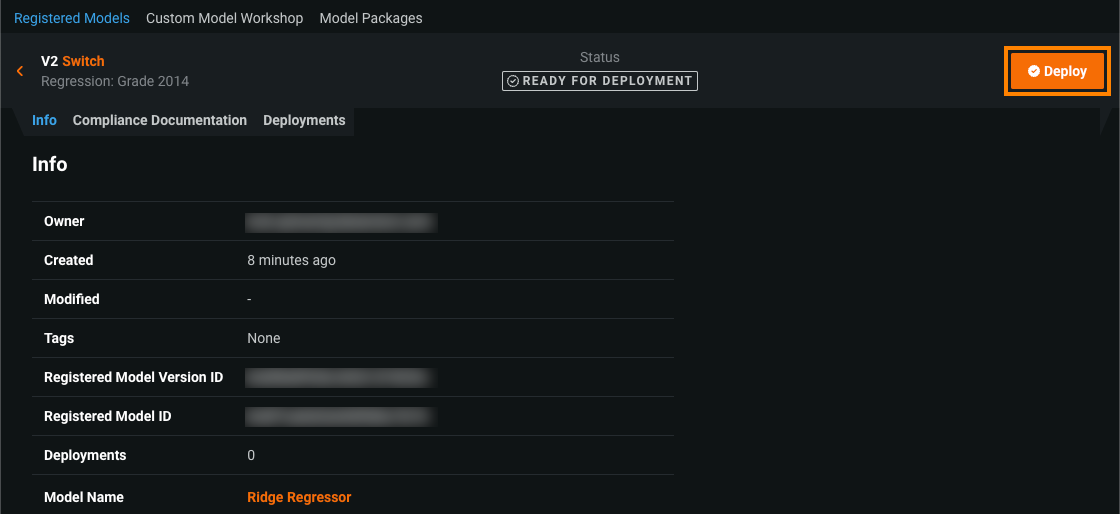
On any tab in the registered model version, click Deploy.
-
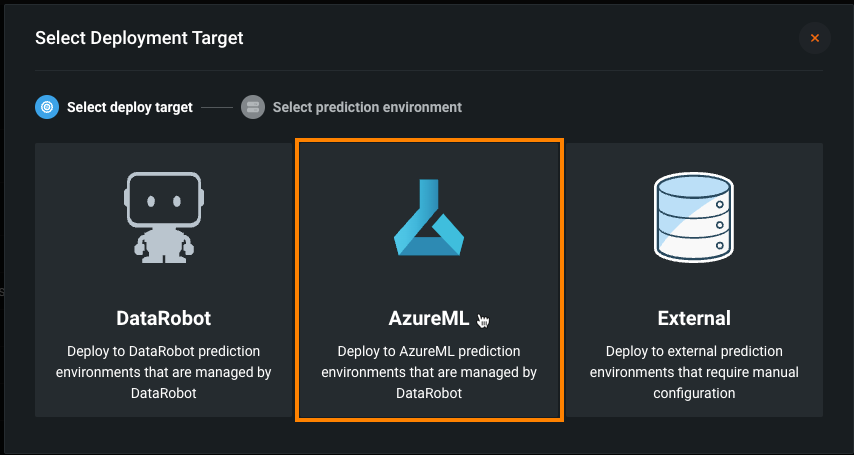
In the Select Deployment Target dialog box, under Select deploy target, click AzureML.
Note
If you can't click the AzureML deployment target, the selected model doesn't have Scoring Code available.
-
Under Select prediction environment, select the AzureML prediction environment you added, and then click Confirm.
-
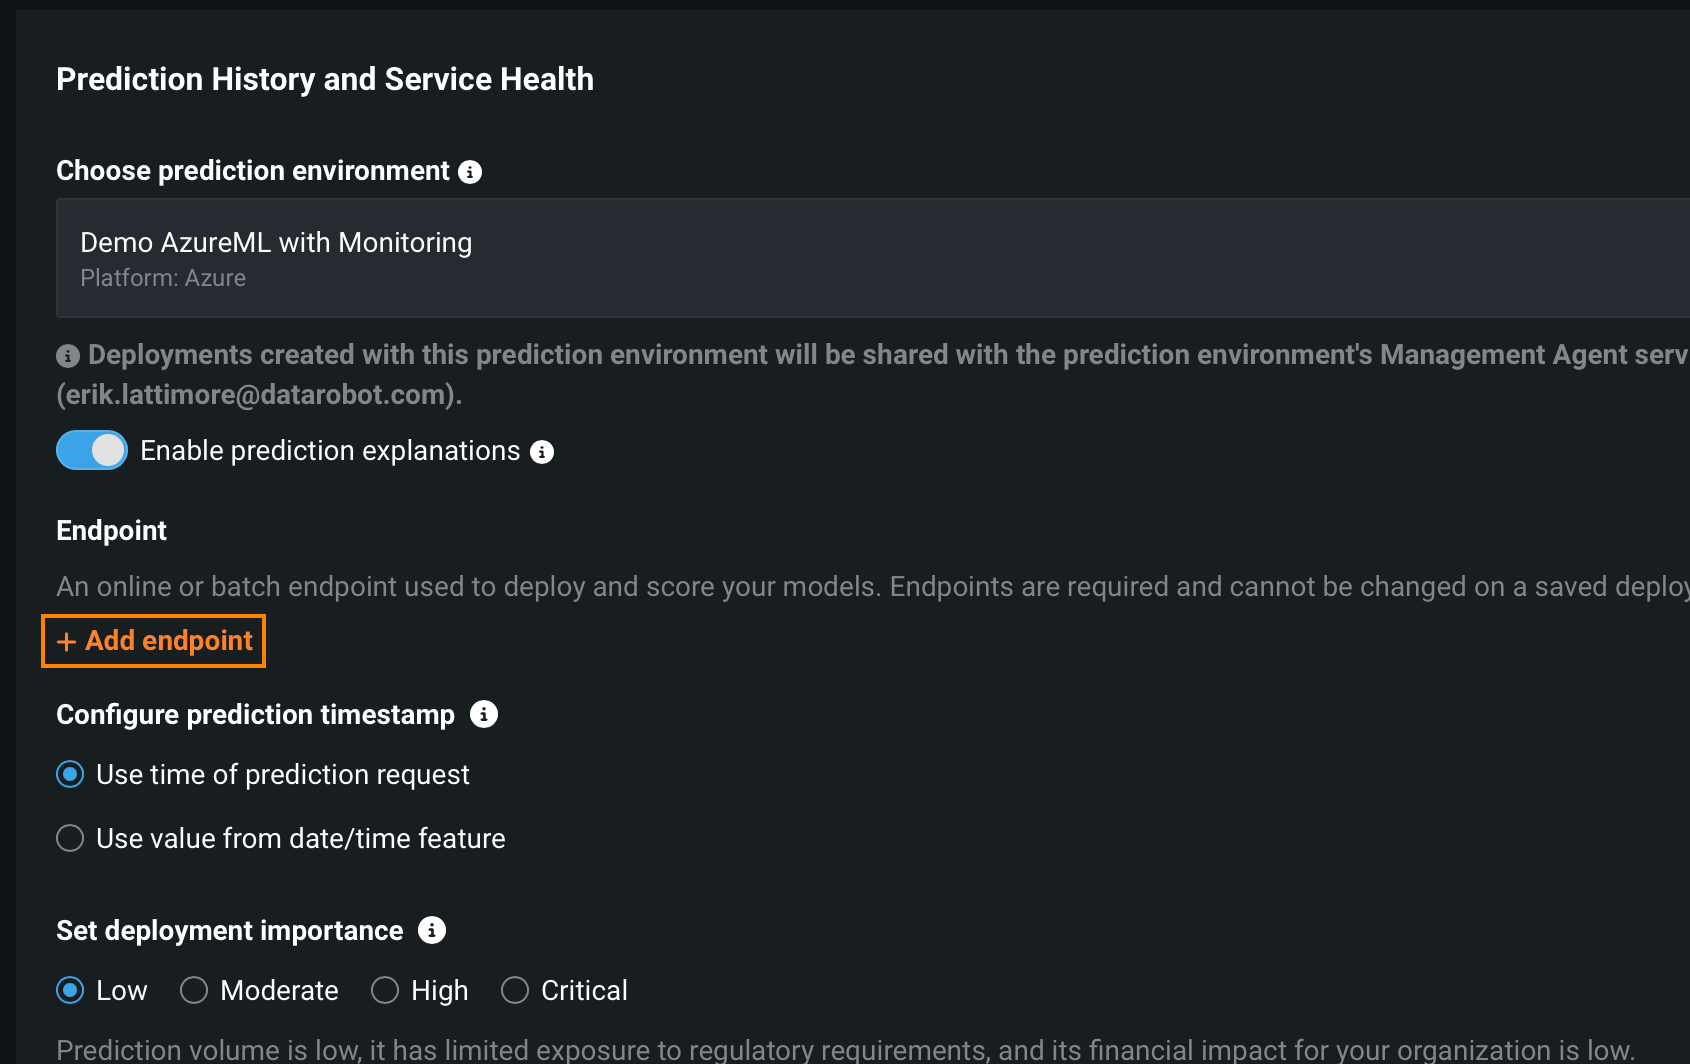
Configure the deployment and, in the Prediction History and Service Health section, under Endpoint, click + Add endpoint.
-
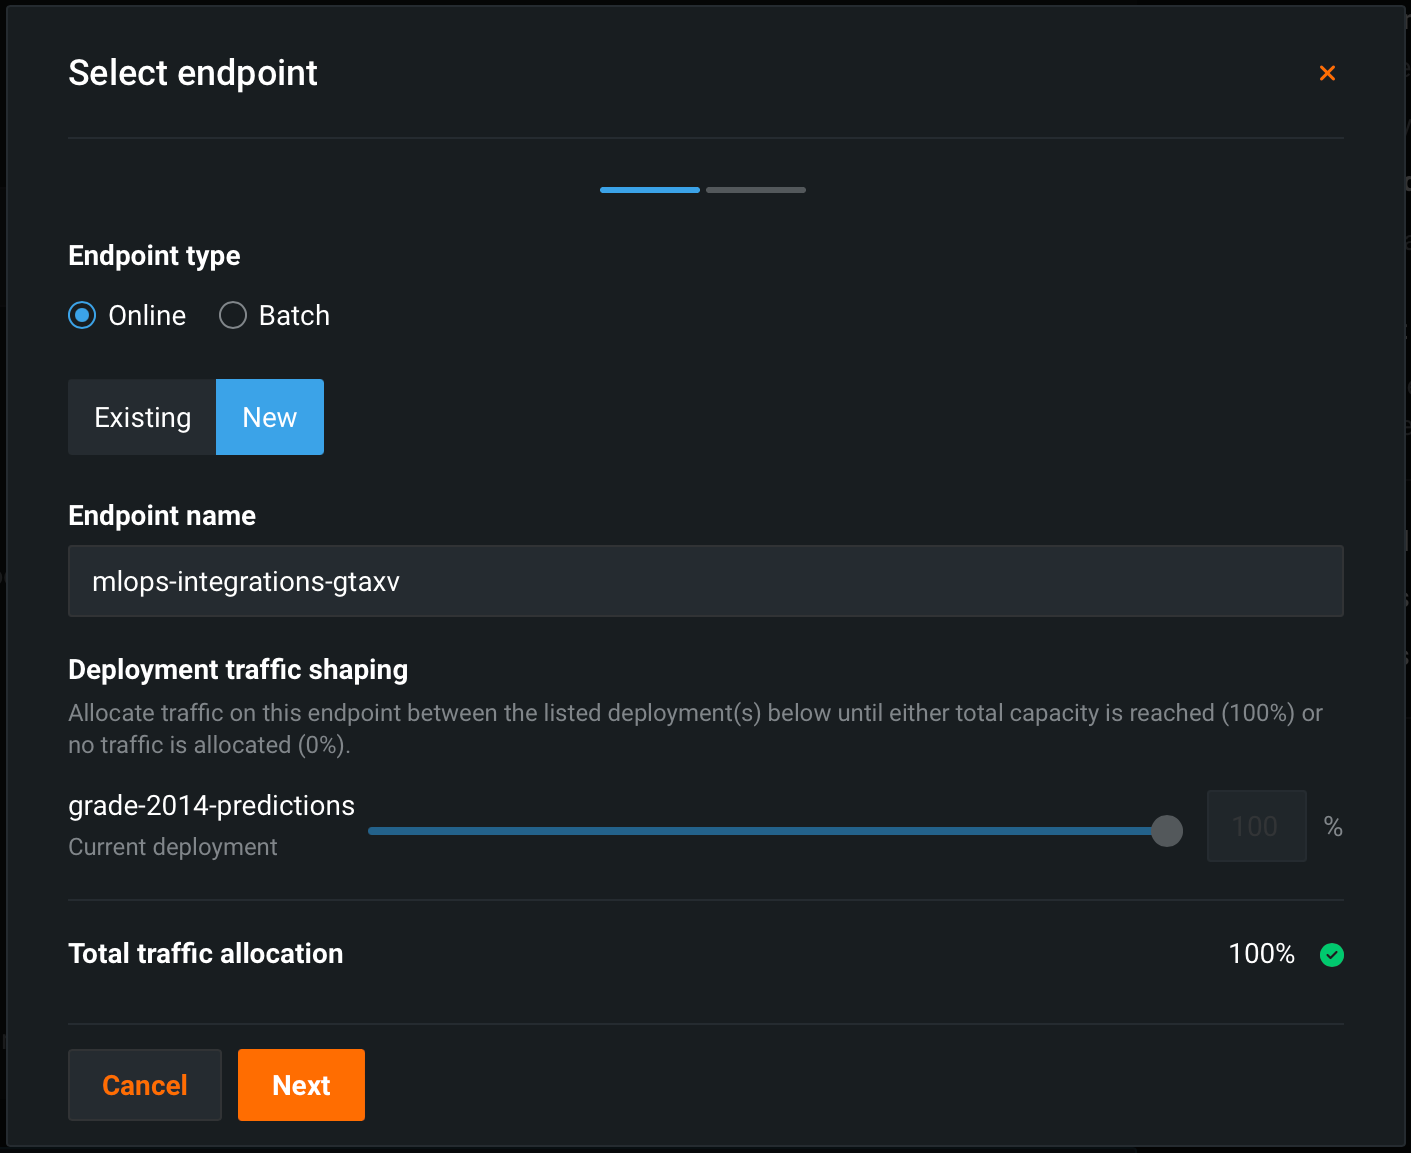
In the Select endpoint dialog box, define an Online or Batch endpoint, depending on your expected workload, and then click Next.
-
(Optional) Define additional Environment key-value pairs to provide extra parameters to the Azure deployment interface, then click Confirm.
-
Click Deploy model.
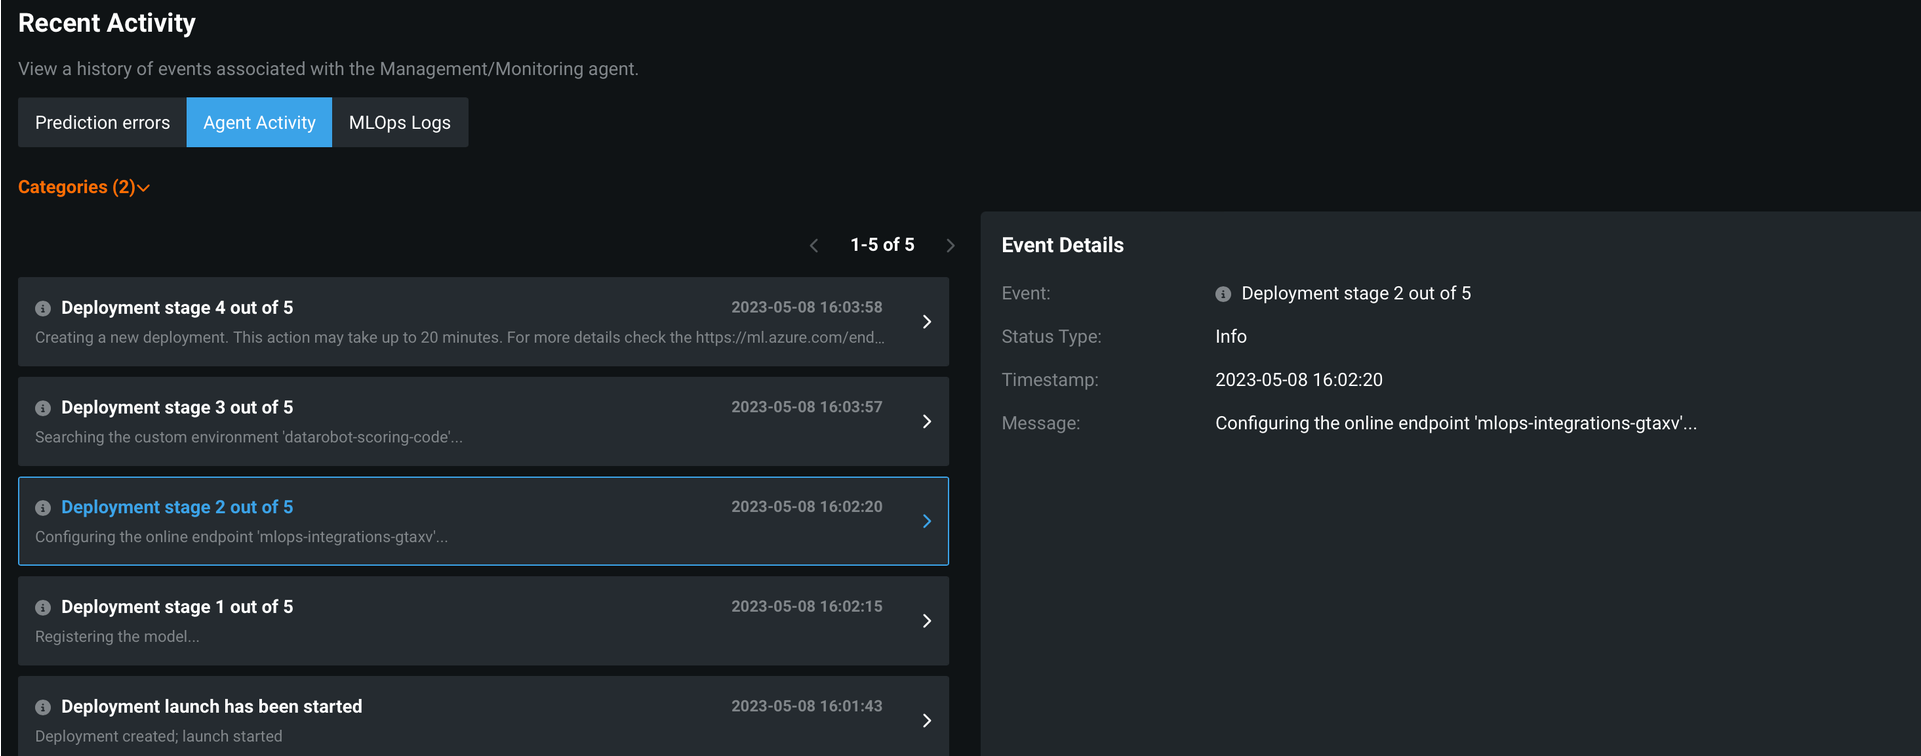
While the deployment is Launching, you can monitor the status events on the Service Health tab in Recent Activity > Agent Activity:
Make predictions in AzureML
After you deploy a model to an AzureML prediction environment, you can use the code snippet from the Predictions > Portable Predictions tab to score data in AzureML.
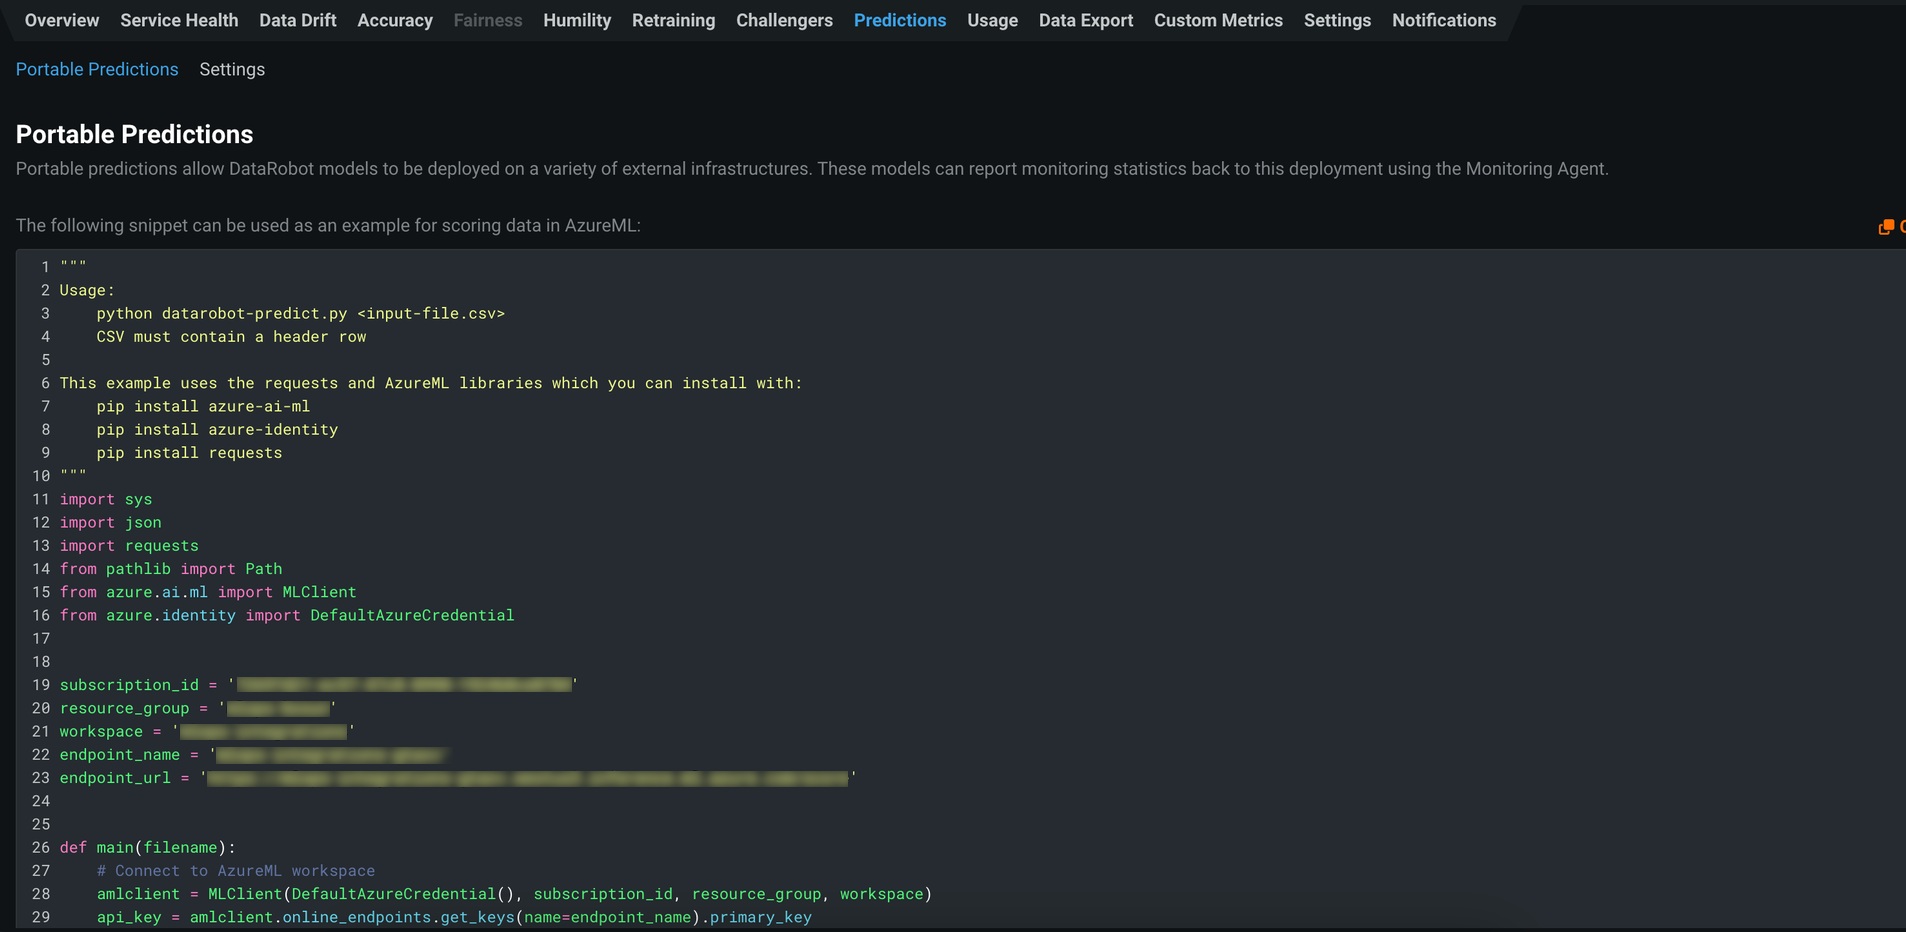
Before you run the code snippet, you must provide the required credentials in either of the following ways:
-
Export the Azure Service Principal’s secrets as environment variables locally before running the snippet:
Environment variable Description AZURE_CLIENT_IDThe Application ID in the App registration > Overview tab. AZURE_TENANT_IDThe Directory ID in the App registration > Overview tab. AZURE_CLIENT_SECRETThe secret token generated in the App registration > Certificates and secrets tab. -
Install the Azure CLI, and run the
az logincommand to allow the portable predictions snippet to use your personal Azure credentials.
Important
Deployments to AzureML Batch and Online endpoints utilize different APIs than standard DataRobot deployments.
-
Online endpoints support JSON or CSV as input and outputs results to JSON.
-
Batch endpoints support CSV input and output the results to a CSV file.