Make a one-time batch prediction
Use the Deployments > Make Predictions tab to efficiently score datasets with a deployed model by making batch predictions.
Note
To make predictions with a model before deployment, select the model from the Leaderboard and navigate to Predict > Make Predictions.
Batch predictions are a method of making predictions with large datasets, in which you pass input data and get predictions for each row. DataRobot writes these predictions to output files. You can also:
-
Schedule Batch Prediction Jobs by specifying the prediction data source and destination and determining when DataRobot runs the predictions.
-
Make predictions with the Batch Prediction API.
Select a prediction source
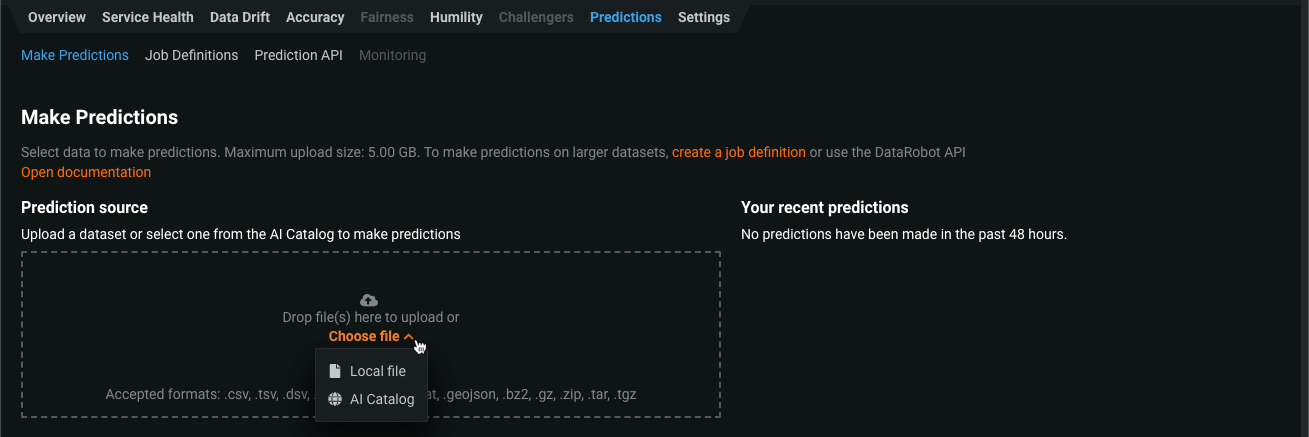
To make batch predictions with a deployed model, navigate to the deployment's Predictions > Make Predictions tab and upload a prediction source:
-
Click and drag a file into the Prediction source group box.
-
Click Choose file to upload a Local file or a dataset stored in the AI Catalog.
Note
When uploading a prediction dataset, it is automatically stored in the AI Catalog once the upload is complete. Be sure not to navigate away from the page during the upload, or the dataset will not be stored in the catalog. If the dataset is still processing after the upload, that means DataRobot is running EDA on the dataset before it becomes available for use.
Make predictions with a deployment
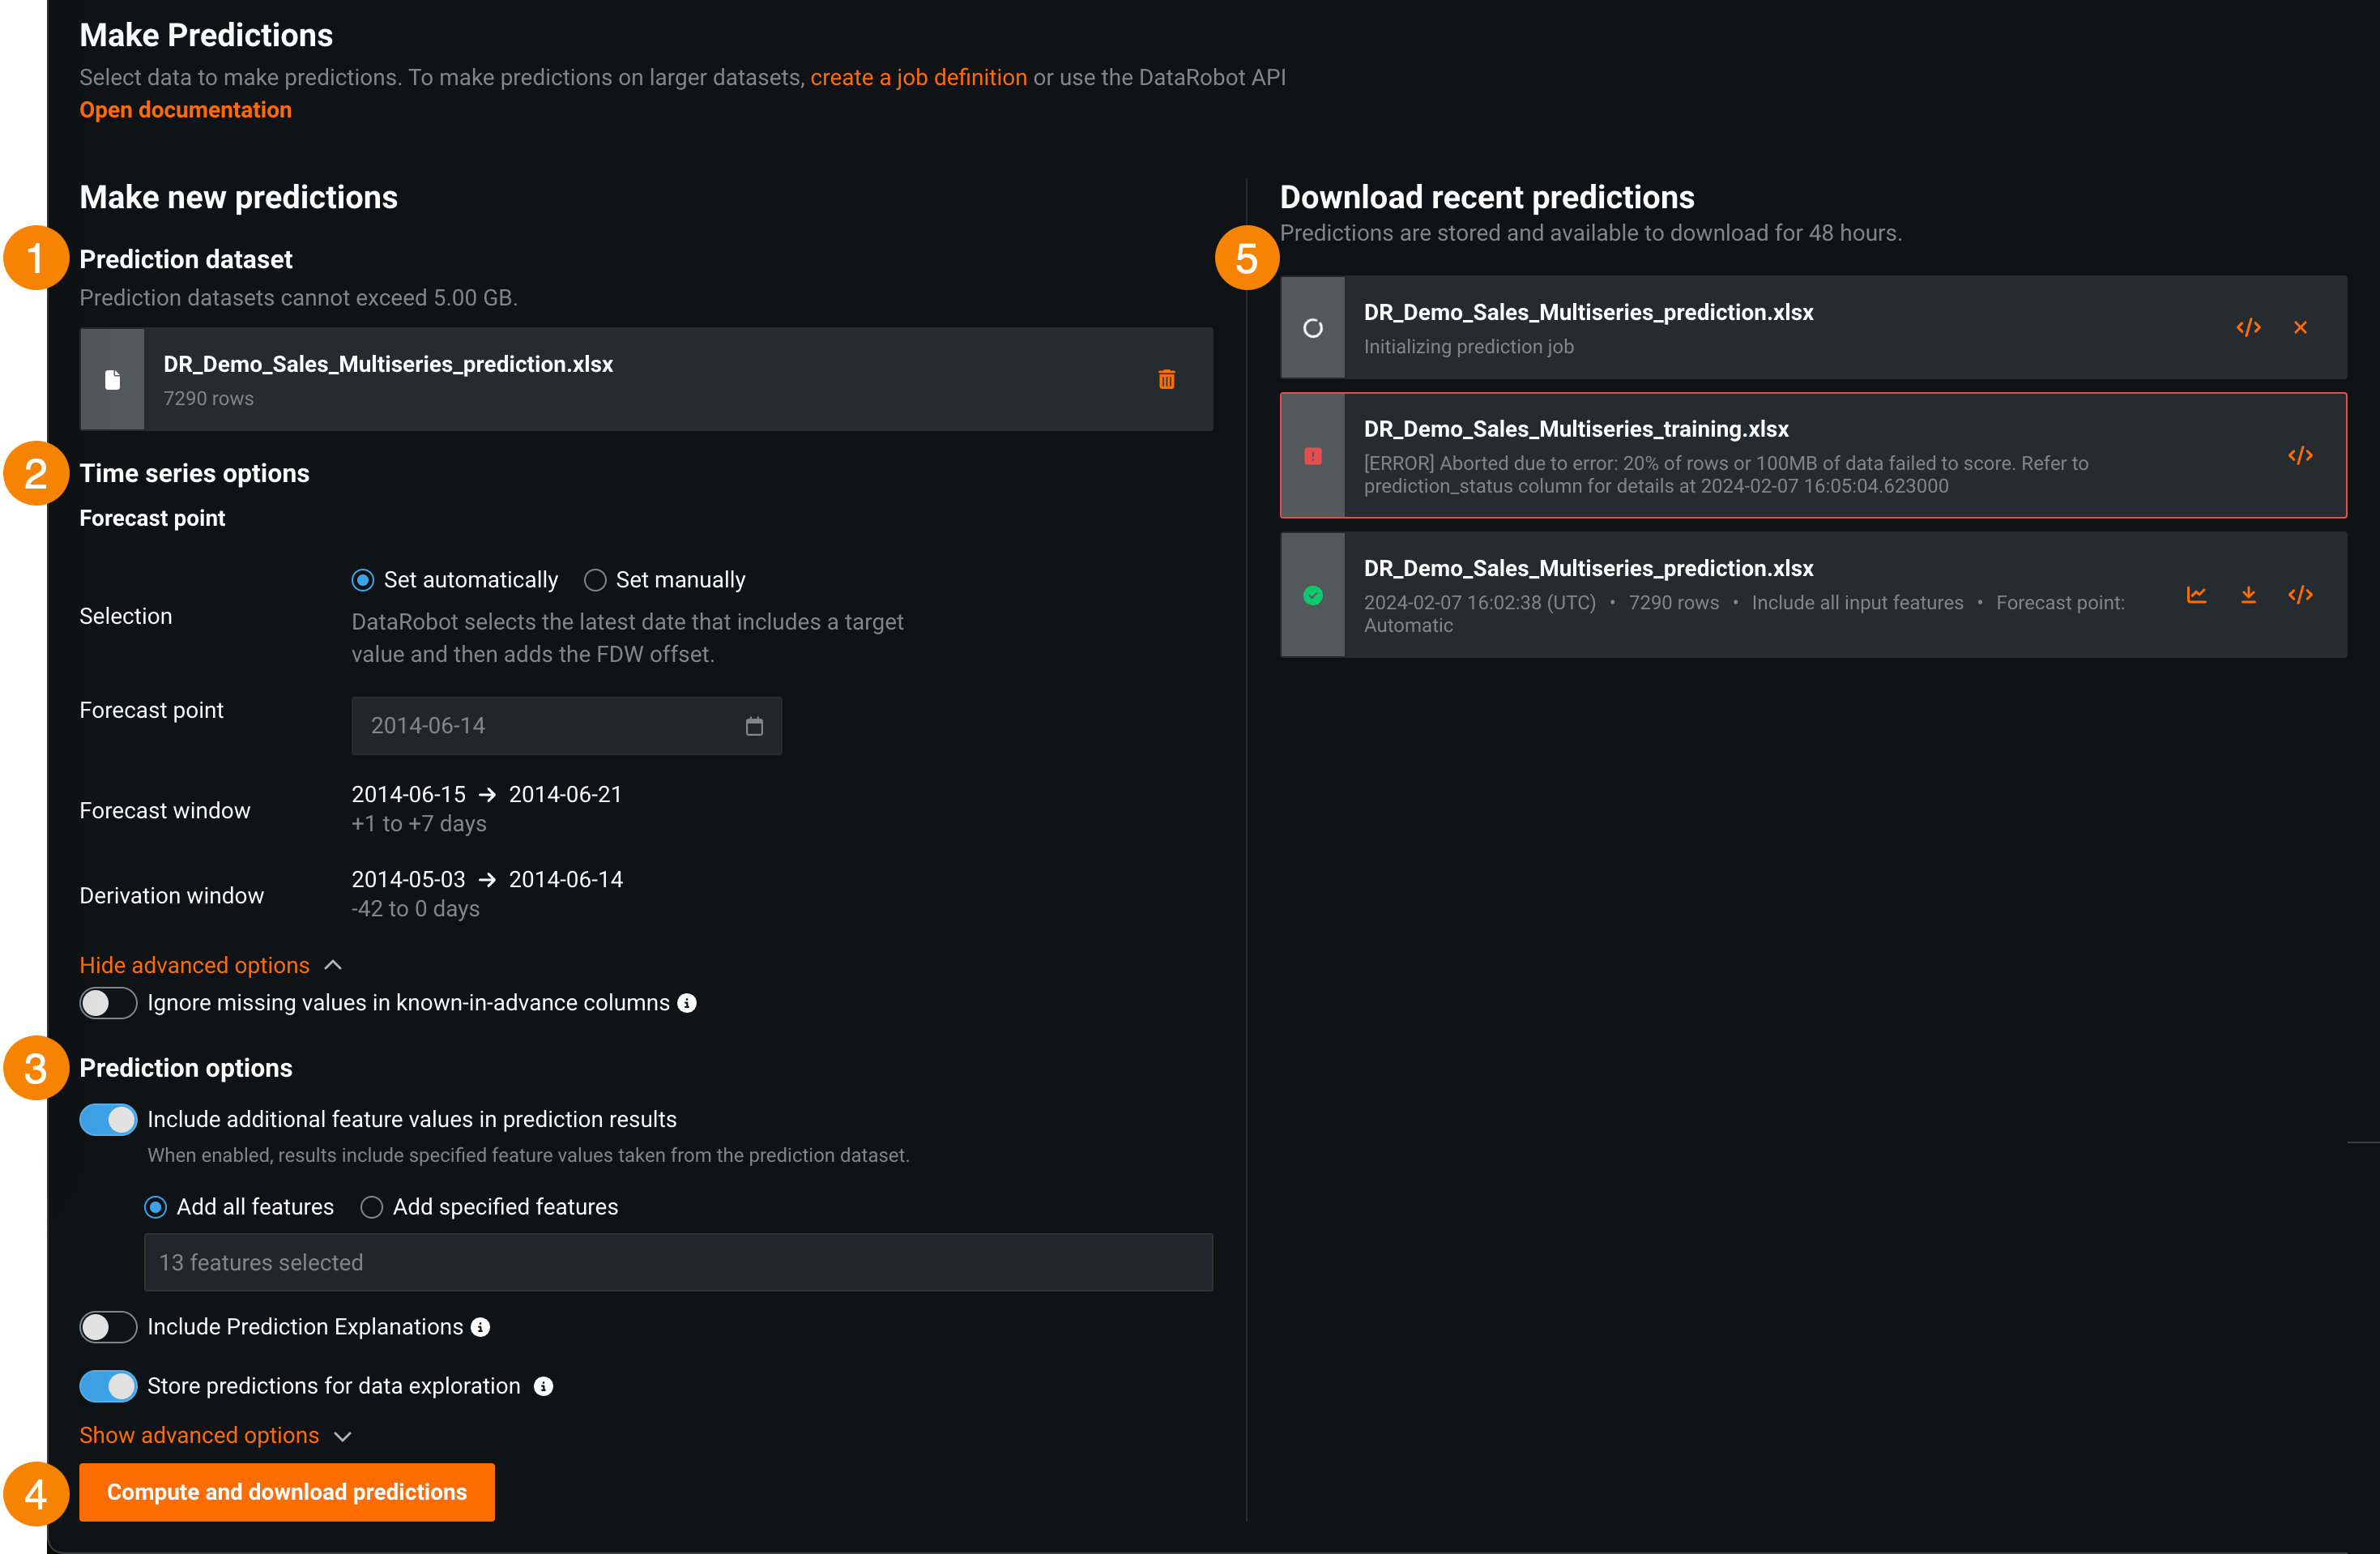
This section explains how to use the Make Predictions tab to make batch predictions for standard deployments and time series deployments.
| Field name | Description | |
|---|---|---|
| 1 | Prediction dataset | Select a prediction source by uploading a local file or importing a dataset from the AI Catalog. |
| 2 | Time series options | Specify and configure a time series prediction method. |
| 3 | Prediction options | Configure the prediction options. |
| 4 | Compute and download predictions | Score the data and download the predictions. |
| 5 | Download recent predictions | View your recent batch predictions and download the results. These predictions are available for download for 48 hours. |
Set time series options
Time series data requirements
Making predictions with time series models requires the dataset to be in a particular format. The format is based on your time series project settings. Ensure the the prediction dataset includes the correct historical rows, forecast rows, and any features known in advance. In addition, to ensure DataRobot can process your time series data, configure the dataset to meet the following requirements:
- Sort prediction rows by their timestamps, with the earliest row first.
- For multiseries, sort prediction rows by series ID and then by timestamp, with the earliest row first.
There is no limit on the number of series DataRobot supports. The only limit is the job timeout, as mentioned in Limits. For dataset examples, see the requirements for the scoring dataset.
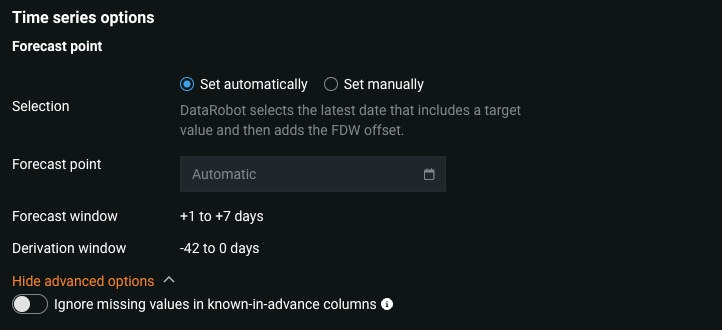
To configure the Time series options, under Time series prediction method, define the Forecast point settings:
-
Set automatically: DataRobot sets the forecast point for you based on the scoring data, generally the latest possible date timestamp that is a valid forecast point.
-
Set manually: Set a specific date range using the date selector, configuring the Start and End dates manually.
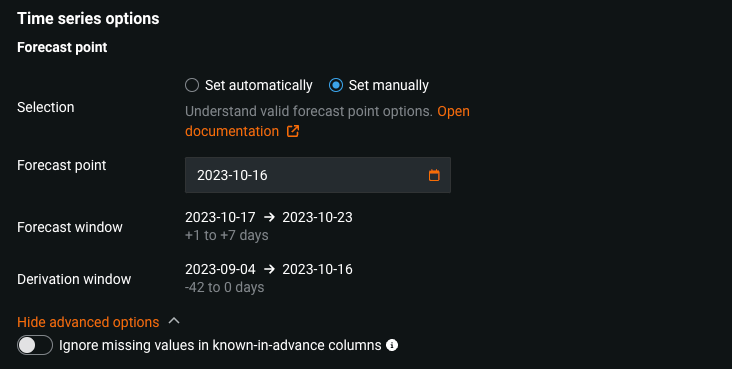
In addition, you can click Show advanced options and enable Ignore missing values in known-in-advance columns to make predictions even if the provided source dataset is missing values in the known-in-advance columns; however, this may negatively impact the computed predictions.
Set prediction options
Once the file is uploaded, configure the Prediction options. (Optional) You can click Show advanced options to configure additional options.
| Element | Description | |
|---|---|---|
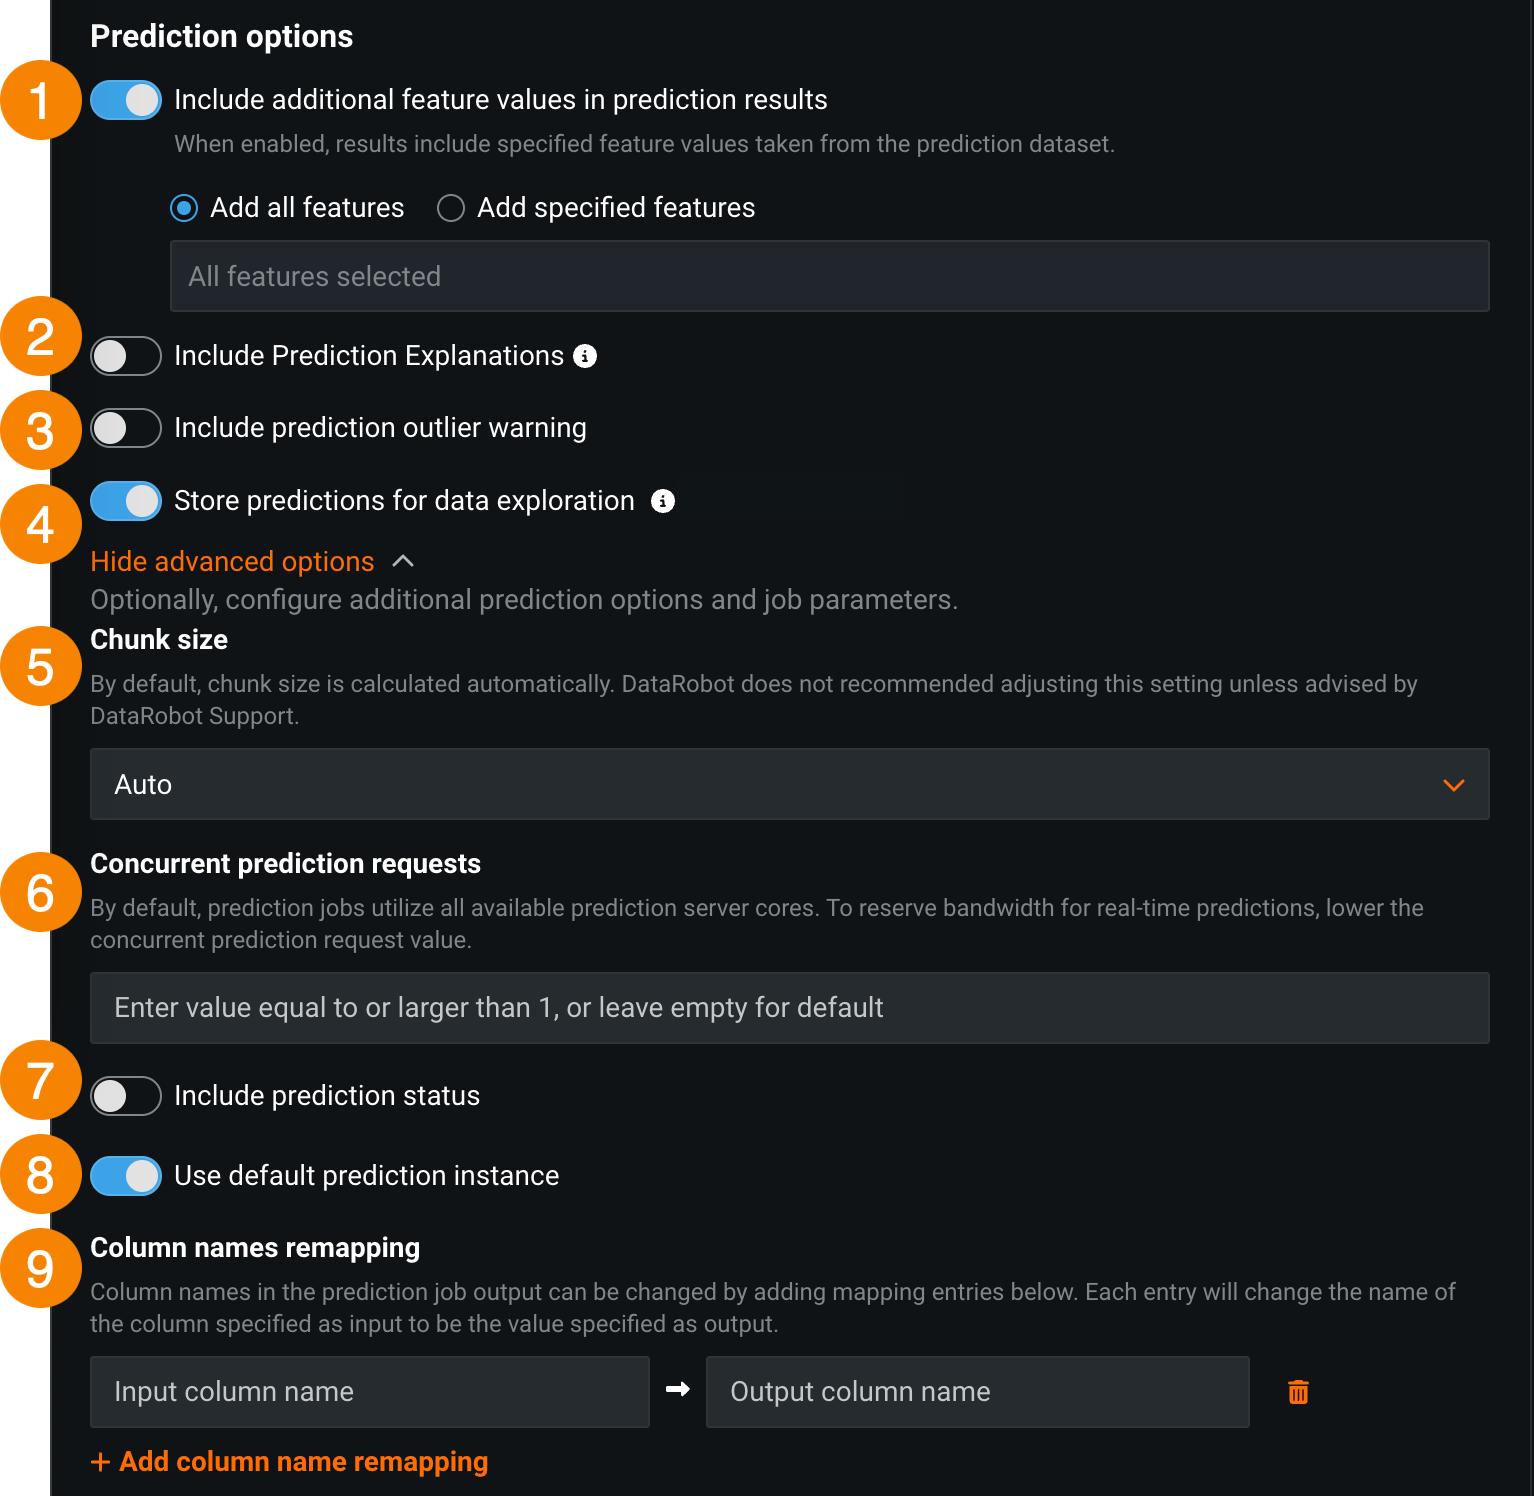
| 1 | Include additional feature values in prediction results | Writes input features to the prediction results file alongside predictions. To add specific features, enable the Include additional feature values in prediction results toggle, select Add specified features, and type feature names to filter for and then select features. To include every feature from the dataset, select Add all features. You can only append a feature (column) present in the original dataset, although the feature does not have to have been part of the feature list used to build the model. Derived features are not included. |
| 2 | Include Prediction Explanations | Adds columns for Prediction Explanations to your prediction output.
|
| 3 | Include prediction outlier warning | Includes warnings for outlier prediction values (only available for regression model deployments). |
| 4 | Store predictions for data exploration | Tracks data drift, accuracy, fairness, and data exploration (if enabled for the deployment). |
| 5 | Chunk size | Adjusts the chunk size selection strategy. By default, DataRobot automatically calculates the chunk size; only modify this setting if advised by your DataRobot representative. For more information, see What is chunk size? |
| 6 | Concurrent prediction requests | Limits the number of concurrent prediction requests. By default, prediction jobs utilize all available prediction server cores. To reserve bandwidth for real-time predictions, set a cap for the maximum number of concurrent prediction requests. |
| 7 | Include prediction status | Adds a column containing the status of the prediction. |
| 8 | Use default prediction instance | Lets you change the prediction instance. Turn the toggle off to select a prediction instance. |
| 9 | Column names remapping | Change column names in the prediction job's output by mapping them to entries added in this field. Click + Add column name remapping and define the Input column name to replace with the specified Output column name in the prediction output. If you incorrectly add a column name mapping, you can click the delete icon to remove it. |
Why can't I enable Prediction Explanations?
If you can't Include Prediction Explanations, it is likely because:
-
The model's validation partition doesn't contain the required number of rows.
-
For a Combined Model, at least one segment champion validation partition doesn't contain the required number of rows. To enable Prediction Explanations, manually replace retrained champions before creating a model package or deployment.
What is chunk size?
The batch prediction process chunks your data into smaller pieces and scores those pieces one by one, allowing DataRobot to score large batches. The Chunk size setting determines the strategy DataRobot uses to chunk your data. DataRobot recommends the default setting of Auto chunking, as it performs the best overall; however, other options are available:
-
Fixed: DataRobot identifies an initial, effective chunk size and continues to use it for the rest of the model scoring process.
-
Dynamic: DataRobot increases the chunk size while model scoring speed is acceptable and decreases the chunk size if the scoring speed falls.
-
Custom: A data scientist sets the chunk size, and DataRobot continues to use it for the rest of the model scoring process.
Compute and download predictions
After you configure predictions settings and click Compute and download predictions to score the data, wait for the prediction job to complete. You can perform the following actions on completed prediction jobs:

| Icon | Action |
|---|---|
| For time series predictions, view the Forecast visualization. | |
| Download the predictions file. | |
| Access logs to view and optionally copy the prediction job run details. |
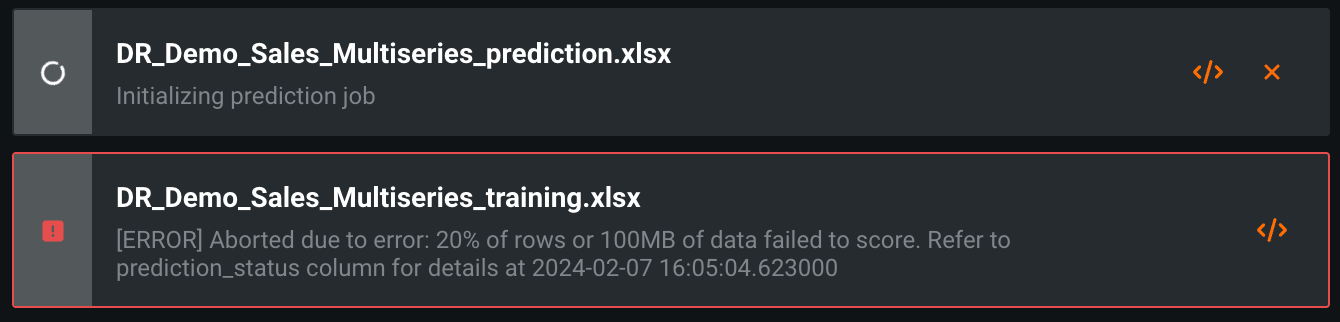
Predictions are available for download on the Predictions > Make Predictions tab for the next 48 hours. You can also view and download predictions and logs on the Deployments > Batch Jobs tab.
Cancel a batch prediction job
Click the stop icon while the job is running to cancel it. For canceled or failed jobs, click the logs icon to view the logs for the job.