Build Visual AI models
As with any DataRobot project, building Visual AI models involves preparing and uploading data:
- Preparing the dataset, with or without additional features types.
- Creating projects from the AI Catalog or via local file upload.
- Reviewing the data before building.
Once you have built models as you would with any DataRobot project, you can:
- Review the data after building.
- Evaluate and fine-tune models.
- Make predictions.
Note
Train-time image augmentation is a processing step that randomly transforms existing images, augmenting the training data. You can configure augmentation both before and after model building.
See additional considerations for working with Visual AI.
Prepare the dataset
When creating projects with Visual AI, you can provide data to DataRobot in a ZIP archive. There are two mechanisms for identifying image locations within the archive:
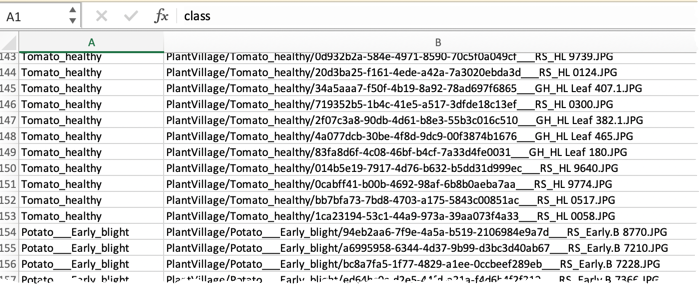
- Using a CSV file that contains paths to images (works for all project types).
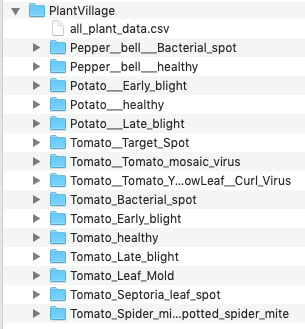
- Using one folder for each image class and file-system folder names as image labels (works for a single-image feature classification dataset).
Note
Additionally, you can encode image data and provide the encoded strings as a column in the CSV dataset. Use base64 format to encode images before registering the data in DataRobot. (Any other encoding format or encoding error will result in model errors.) See this tutorial for access to a script for converting images and for information on how to make predictions on Visual AI projects with API calls.
Before beginning, verify that images meet the size and format guidelines. Once created, you can share and preview the dataset in the AI Catalog.
Dataset guidelines
The following table describes image requirements:
| Support | Type |
|---|---|
| File types | .jpeg*, .jpg*, .png, .bmp, .ppm, .gif, .mpo, and .tiff/.tif |
| Bit support | 8-bit, 16-bit** |
| Pixel size |
|
Additionally:
- Visual AI class limit is the same as non-Visual AI (1000 classes).
- Image subfolders must not be zipped (that is, no nested archives in the dataset's main ZIP archive).
- Any image paths referenced in the CSV must be included in the uploaded archive—they cannot be a remote URL.
- File and folder names cannot contain whitespaces.
- Use
/(not\) for file paths.
* JPEG and lossy compression
JPEG (or .jpg) image format is, by definition, a LOSSY format. The JPEG standard does not guarantee to produce bit-for-bit identical output images; it requires only that the error produced by the decoder/encoder is lower than the error specified by the standard. As a result, the same image can be decoded with slight differences, even when the same library version is used. If keeping prediction results consistent is required, use the data preparation script that is described here to convert images to base64-encoded strings and then upload them.
** How are 16-bit images handled
DataRobot supports 16-bit images by converting the image internally to three 8-bit images (3x8-bit). Because TIFF images are processed by taking the first image, the resulting 16-bit image is essentially a greyscale image, which DataRobot then rescales. For more detail, see the Pillow Image Module documentation.
Paths for image uploads
Use a CSV for any type of project (regression or classification), both a straight class-and-image and when you want to add features to your dataset. With this method, you provide images in the same directory as the CSV in one of the following ways:
- Create a single folder with all images.
- Separate images into folders.
- Include the images, outside of folders, alongside the CSV.
To set up the CSV file:
-
Create a CSV in the same directory as the images with, at a minimum, the following columns:
- Target column.
- Relative path to each image.
-
Include any additional features.
If you have multiple images for a row, you can create an individual column in the dataset for each. If your images are categorized for example the front, back, left, and right of a healthy tomato plant, best practice suggests creating one column for each category (one column for front images, one for back images, one for left images, and one for right). If there is not an image in each row of an added column, DataRobot treats it as a missing value.
Create a ZIP archive of the directory and drag-and-drop it into DataRobot to start a project or add it to the AI Catalog.
Quick CSV example
Let’s say you have data about 600 articles of clothing. For each article, you know the brand, size, and category. Additionally, you have a text description and two pictures for each (one front image and one back image).
- Create a
ClothesDatasetfolder. - Add all the images to
ClothesDataset. You can put images in a single subfolder or put them into two subfolders (front images and back images). - Create a CSV file containing four columns: Brand, Size, Category, and Description.
- Add two columns to the CSV file for images: Front and Back. The Front column will contain the relative path to the Front image; the Back column will contain the relative path to the Back image.
- Create a ZIP file from the
ClothesDatasetfolder. - Upload your ZIP file into DataRobot.
DataRobot automatically identifies and creates a six-column dataset: four columns for item Brand, Size, Category, and Description and two columns for images (Front and Back). Now you can build a model to predict the category from the item's brand, size, and description, along with the front and back pictures of the related item.
Folder-based image datasets
When adding only images, prepare your data by creating a folder for each class and putting images into the corresponding folders. For example, the classic "is it a hot dog?" classification would look like this, with a folder containing images of hot dogs and a folder of images that are not hot dogs:
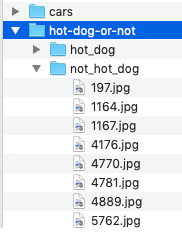
Once image collection is complete, ZIP the folders into a single archive and upload the archive directly into DataRobot as a local upload or add it to the AI Catalog.
Quick folder example
Let's say you have 300 images: 100 images of oranges, 100 images of apples, and 100 images of grapefruit.
- Create three folders: Orange, Apple, and Grapefruit.
- Drop your images into the correct folders depending on the type of fruit. (Do not zip the subfolders.)
- Create a ZIP file in the parent directory of the three folders. The ZIP file will contain the three folders and the images inside.
- Drag and drop, or upload, your ZIP file into DataRobot.
DataRobot will automatically identify and create a three-column dataset: one for the label (Apple, Orange, Grapefruit), another for the image, and a third for the image path.
Create projects from the AI Catalog
It is common to access and share image archives from the AI Catalog, where all tabs and catalog functionality are the same for image and non-image projects. The AI Catalog helps to get a sense of image features and check whether everything appears as expected before you begin model building.
To add an archive to the catalog:
-
Use the Local File option to upload the archive. When the dataset has finished registering, a banner indicates that publishing is complete.
-
Select the Profile tab to see a sample for each image class.
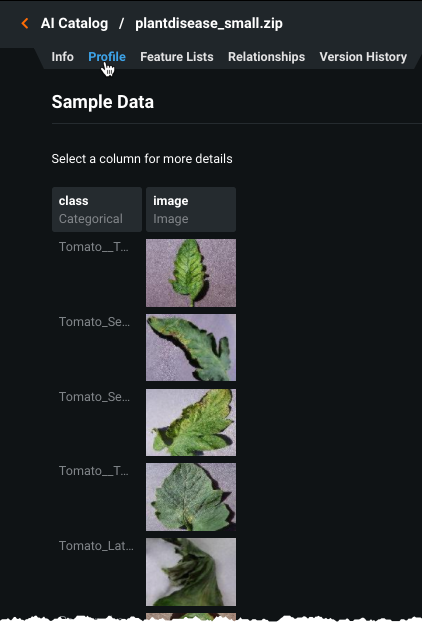
-
Click on a sample image to display unique and missing value statistics for the image class.
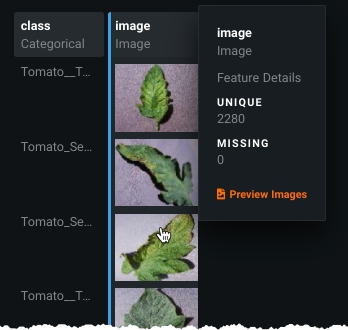
-
Click the Preview Images link to display 30 randomly selected images from the dataset.
-
Click Create project to kick off EDA1 (for materialized datasets).
Next, review your data before building models.
Review data before building
After EDA1 completes, whether initiated from the AI Catalog or drag-and-drop, DataRobot runs data quality checks, identifies column types, and provides a preview of images for sampling. Confirm on the Data page that DataRobot processed dataset features as class and image:
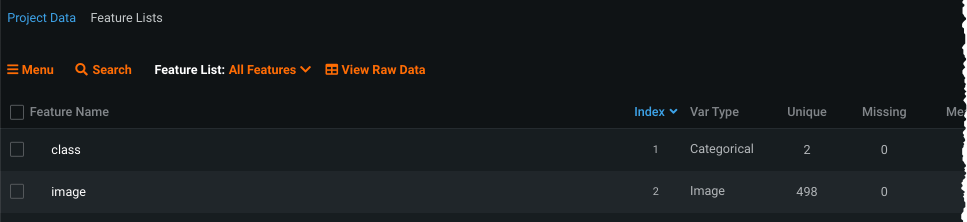
After previewing images and data quality, as described below, you can build models using the regular workflow, identifying class as the target.
Data quality checks
Visual AI uses the Data Quality Assessment tool, with specific checks in place for images. After EDA1 completes, access the results from the Data page:
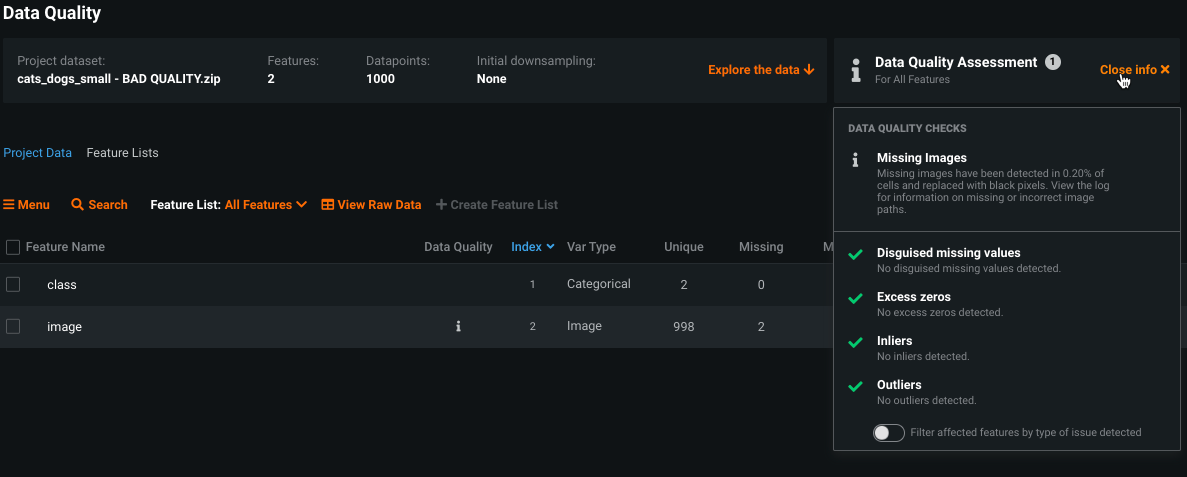
If images are missing, a dedicated section reports the percent missing as well as provides access to a log that provides more detail. "Missing" images include those with bad or unresolved paths (file names that don't exist in the archive) or an empty cell in the column expecting an image path. Click Preview log to open a modal showing per-image detail.
Data page checks
From the Data page do the following to ensure that image files are in order:
- Confirm that DataRobot has identified images as Var Type
image. -
Expand the
imagerow in the data table to open the image preview, a random sample of 30 images from the dataset (the full dataset will be used for training). The preview confirms that the images were processed by DataRobot and also allows you to confirm that it is the image set you intended to use.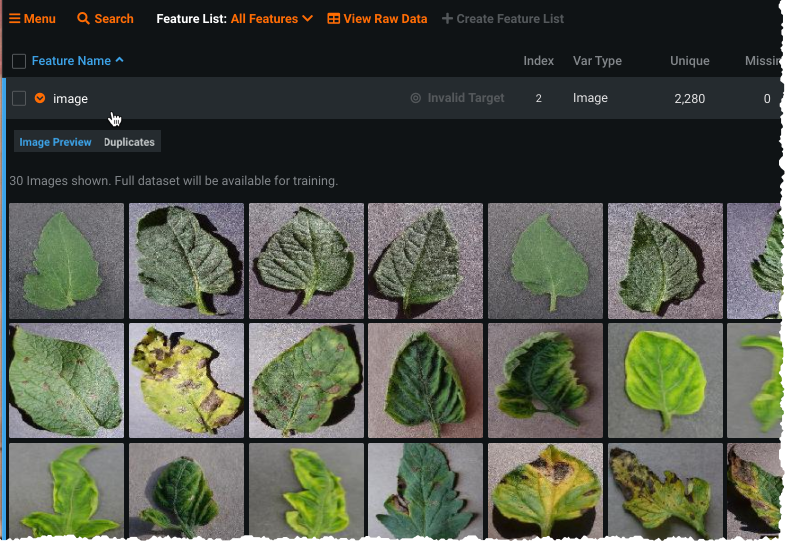
-
Click View Raw Data to open a modal displaying up to a 1MB random sample of the raw data DataRobot will be using to build models, both images and corresponding class.
Review data after building
After you have built a project using the standard workflow, DataRobot provides additional information from the Data page.
Expand the image feature and click Image Preview. This visualization initially displays one sample for each class in your dataset. Click a class to display more samples for that class:
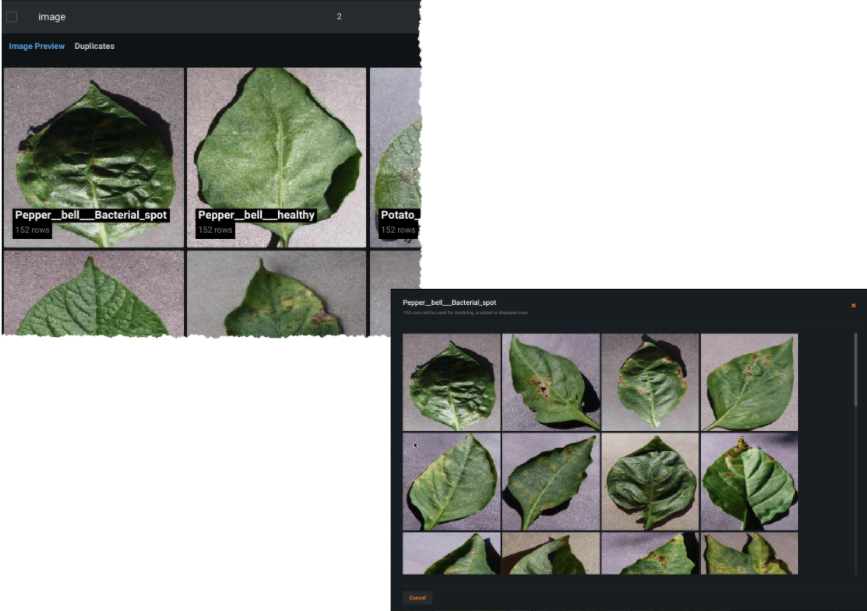
Click the Duplicates link to view whether DataRobot detected any duplicate images in your dataset. Duplicates are reported for:
- the same filename in more than one row of the dataset
- two images with different names but, as determined by DataRobot, exactly the same content
Predictions
Use the same prediction tools with Visual AI as with any other DataRobot project. That is, select a model and make predictions using either Make Predictions or Deploy. The requirements for the prediction dataset are the same as those for the modeling set.
Refer to the section on image predictions for more details.
Feature considerations
-
For Prediction Explanations, there is a limit of 10,000 images per prediction dataset. Because DataRobot does not run EDA on prediction datasets, it estimates the number of images as
number of rowsxnumber of image columns. As a result, missing values will count toward the image limit. -
Image Explanations, or Prediction Explanations for images, are not available from a deployment (for example, Batch predictions or the Predictions API).
-
There is no drift tracking for image features.
-
Although Scoring Code export is not supported, you can use Portable Prediction Servers.
-
Object detection is not available.
-
Visual AI does not support time series. Time-aware OTV projects are supported.