Generative model monitoring
Availability information
Monitoring support for generative models is a premium feature. Contact your DataRobot representative or administrator for information on enabling this feature.
Using the text generation target type for custom and external models, a premium LLMOps feature, deploy generative Large Language Models (LLMs) to make predictions, monitor service, usage, and data drift statistics, and create custom metrics. DataRobot supports LLMs through two deployment methods:
| Method | Description |
|---|---|
| Create a text generation model as a custom model in DataRobot | Create and deploy a text generation model using the Custom Model Workshop, calling the LLM's API to generate text and allowing MLOps to access the LLM's input and output for monitoring. To call the LLM's API, you should enable public network access for custom models. |
| Monitor a text generation model running externally | Create and deploy a text generation model on your infrastructure (local or cloud), using the monitoring agent to communicate the input and output of your LLM to DataRobot for monitoring. |
Create and deploy a generative custom model
Custom inference models are user-created, pretrained models that you can upload to DataRobot (as a collection of files) via the Model workshop. You can then upload a model artifact to create, test, and deploy custom inference models to DataRobot's centralized deployment hub.
Add a generative custom model
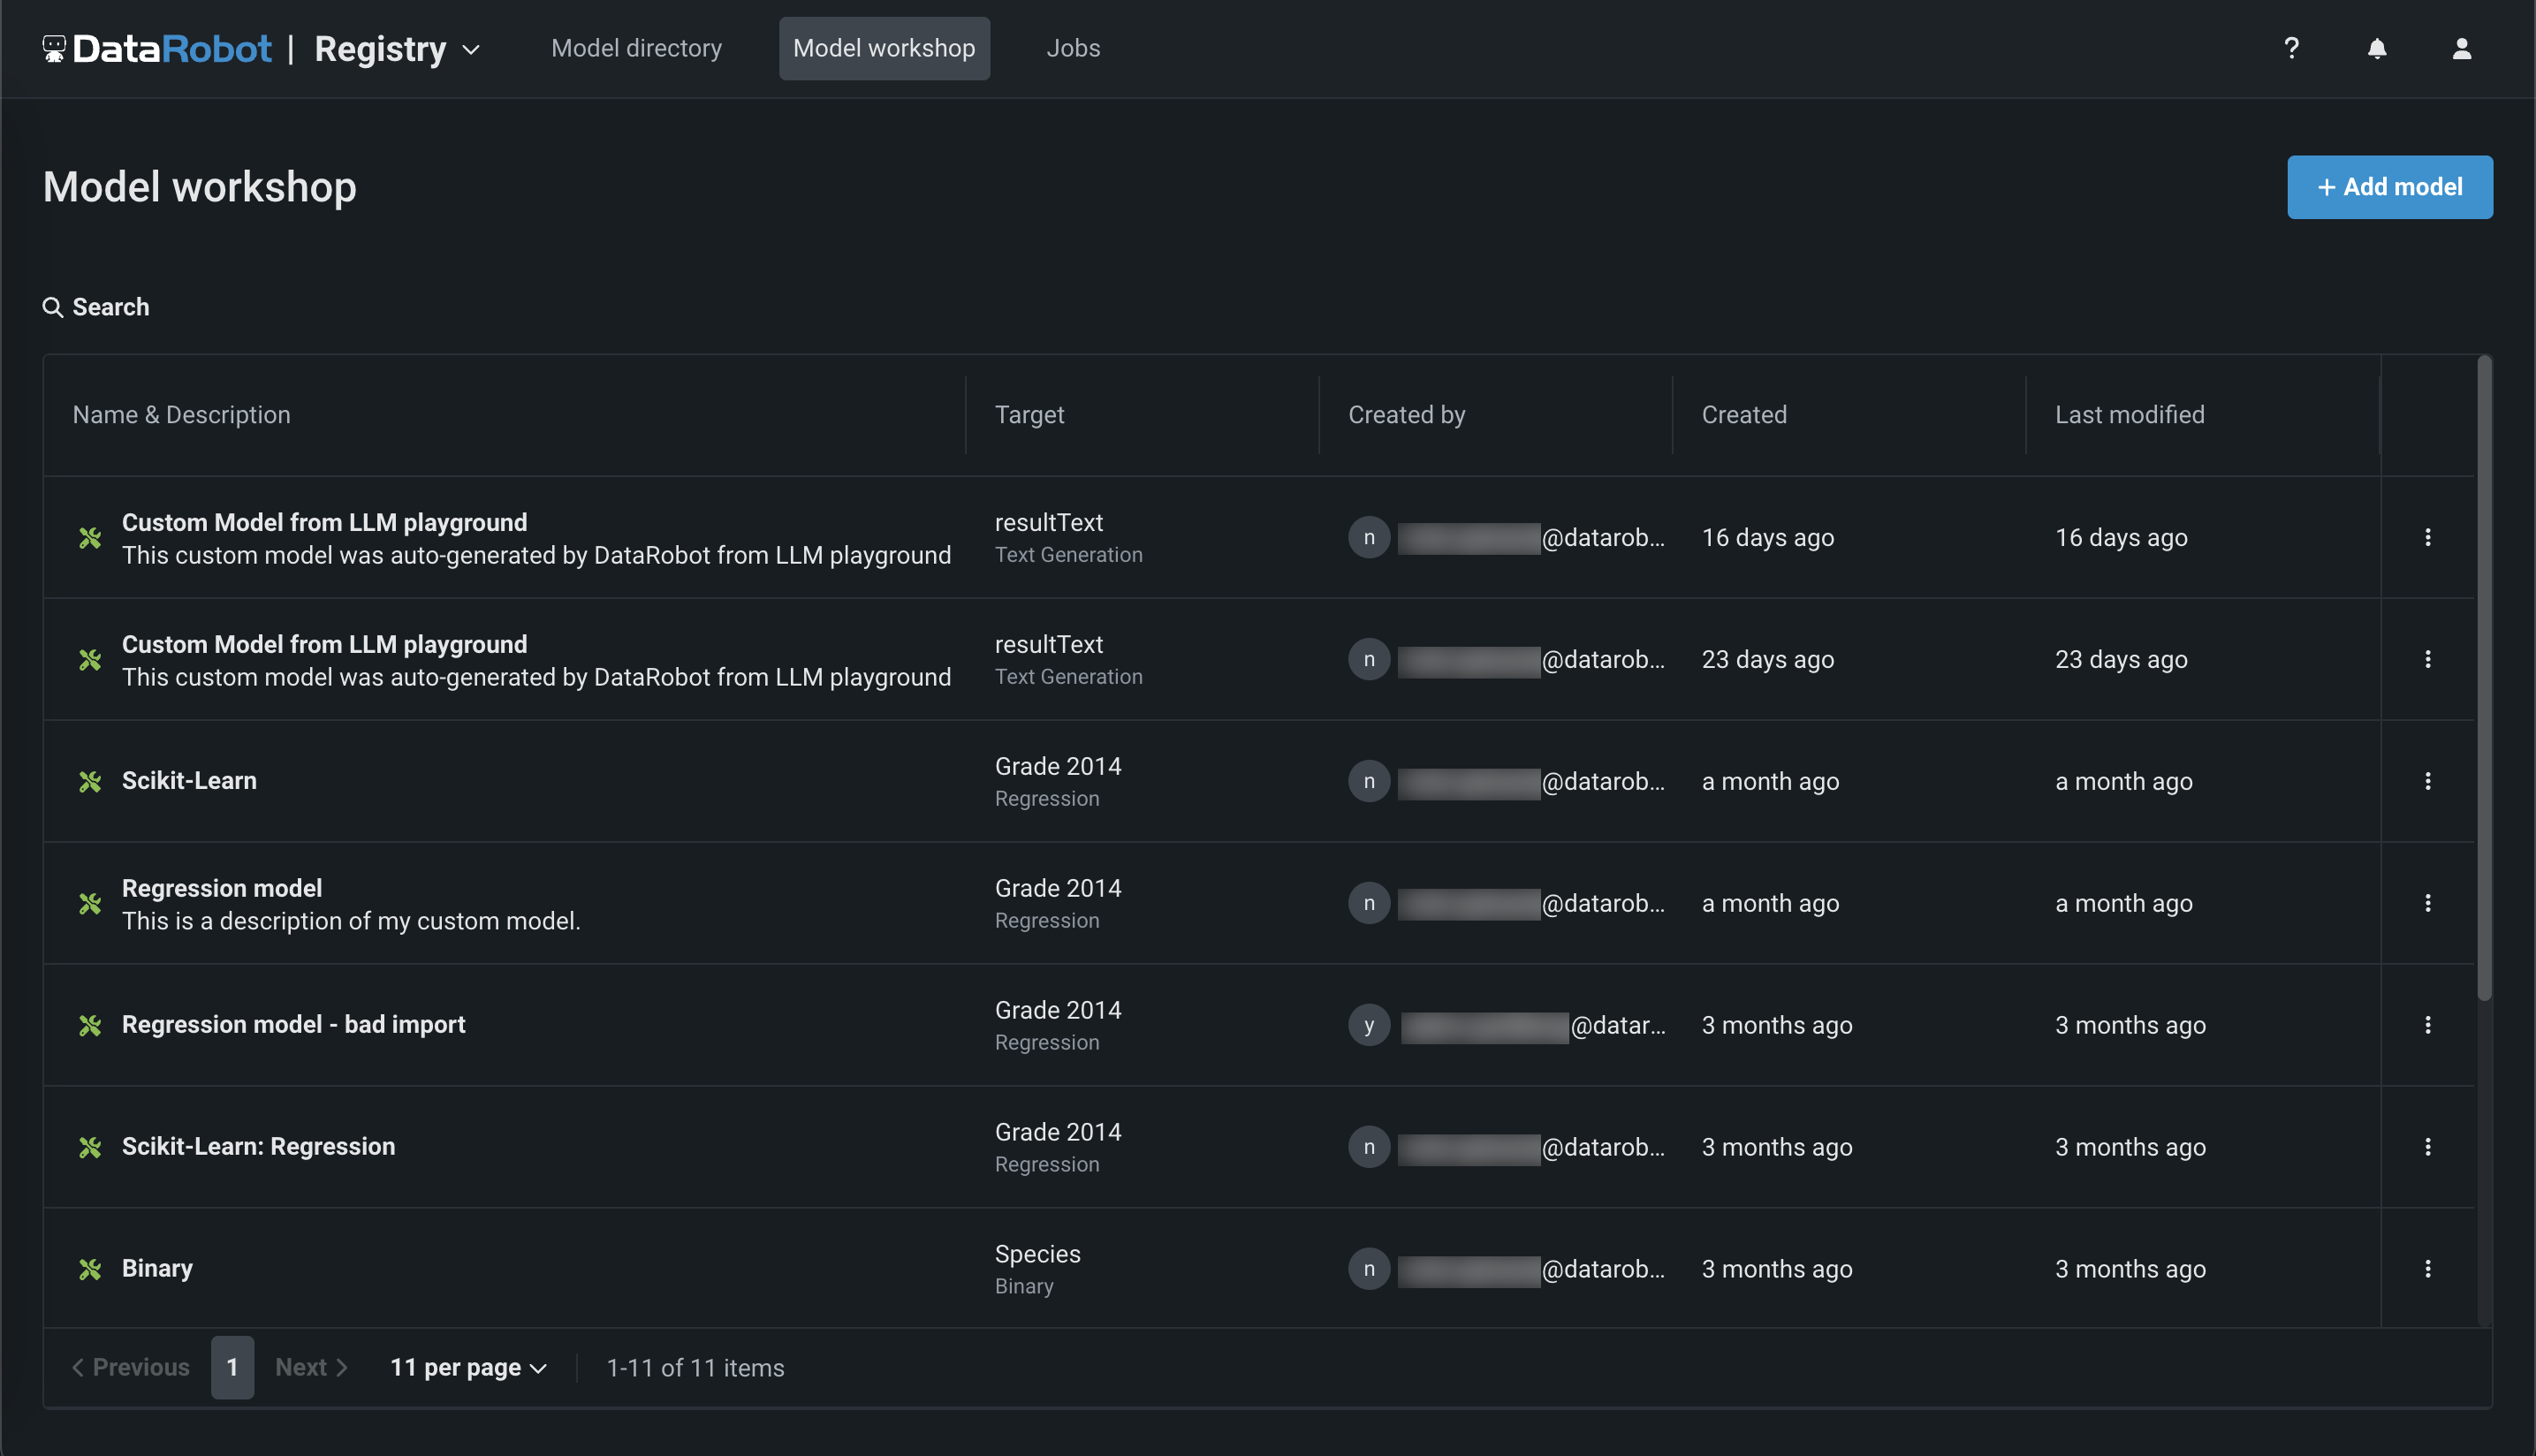
To add a generative model to the Model workshop:
-
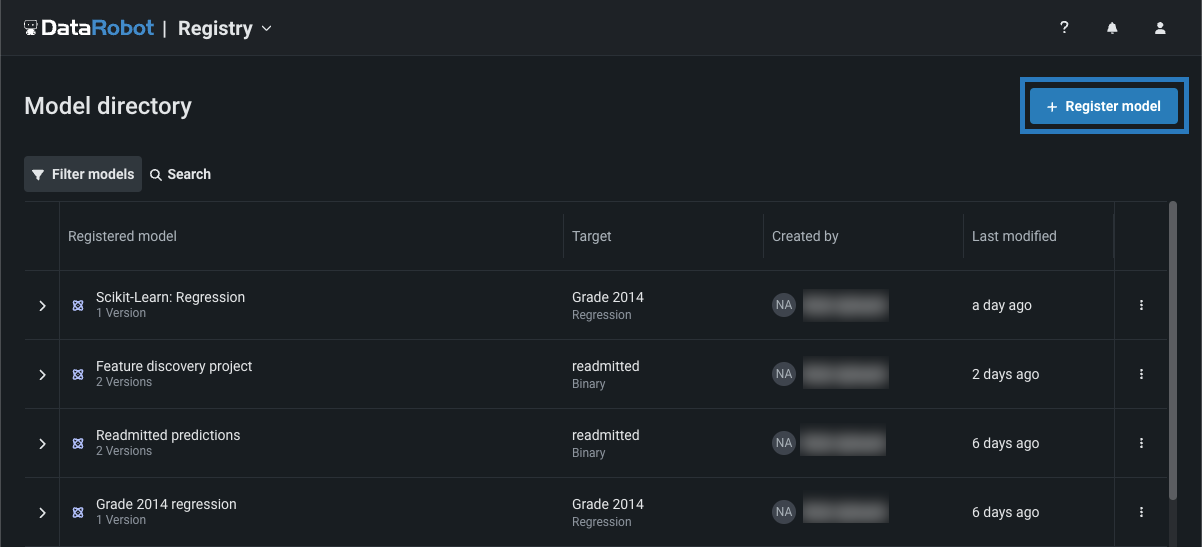
Click Registry > Model workshop. This tab lists the models you have created:
-
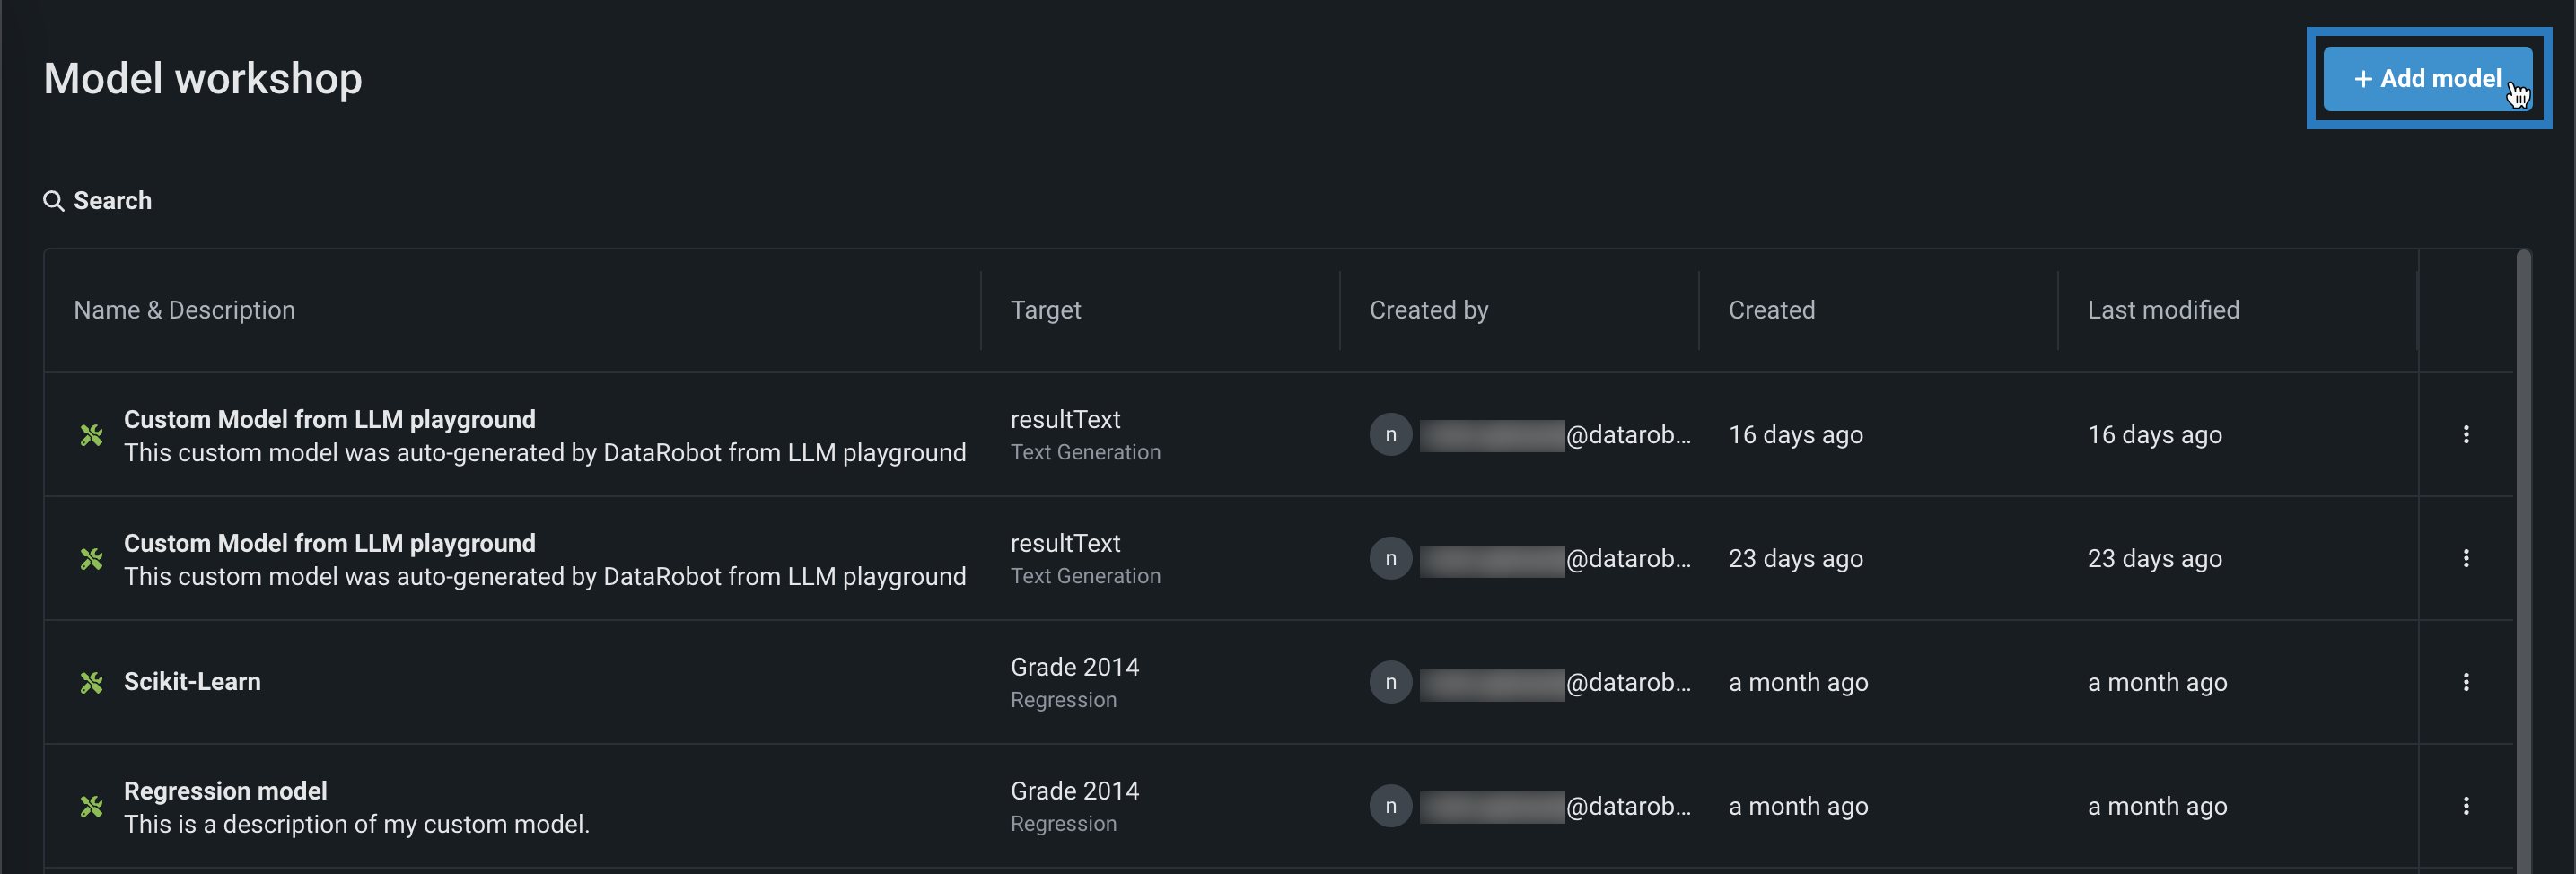
Click + Add model (or the button when the custom model panel is open):
-
On the Add a model page, define the following fields under Configure the model:
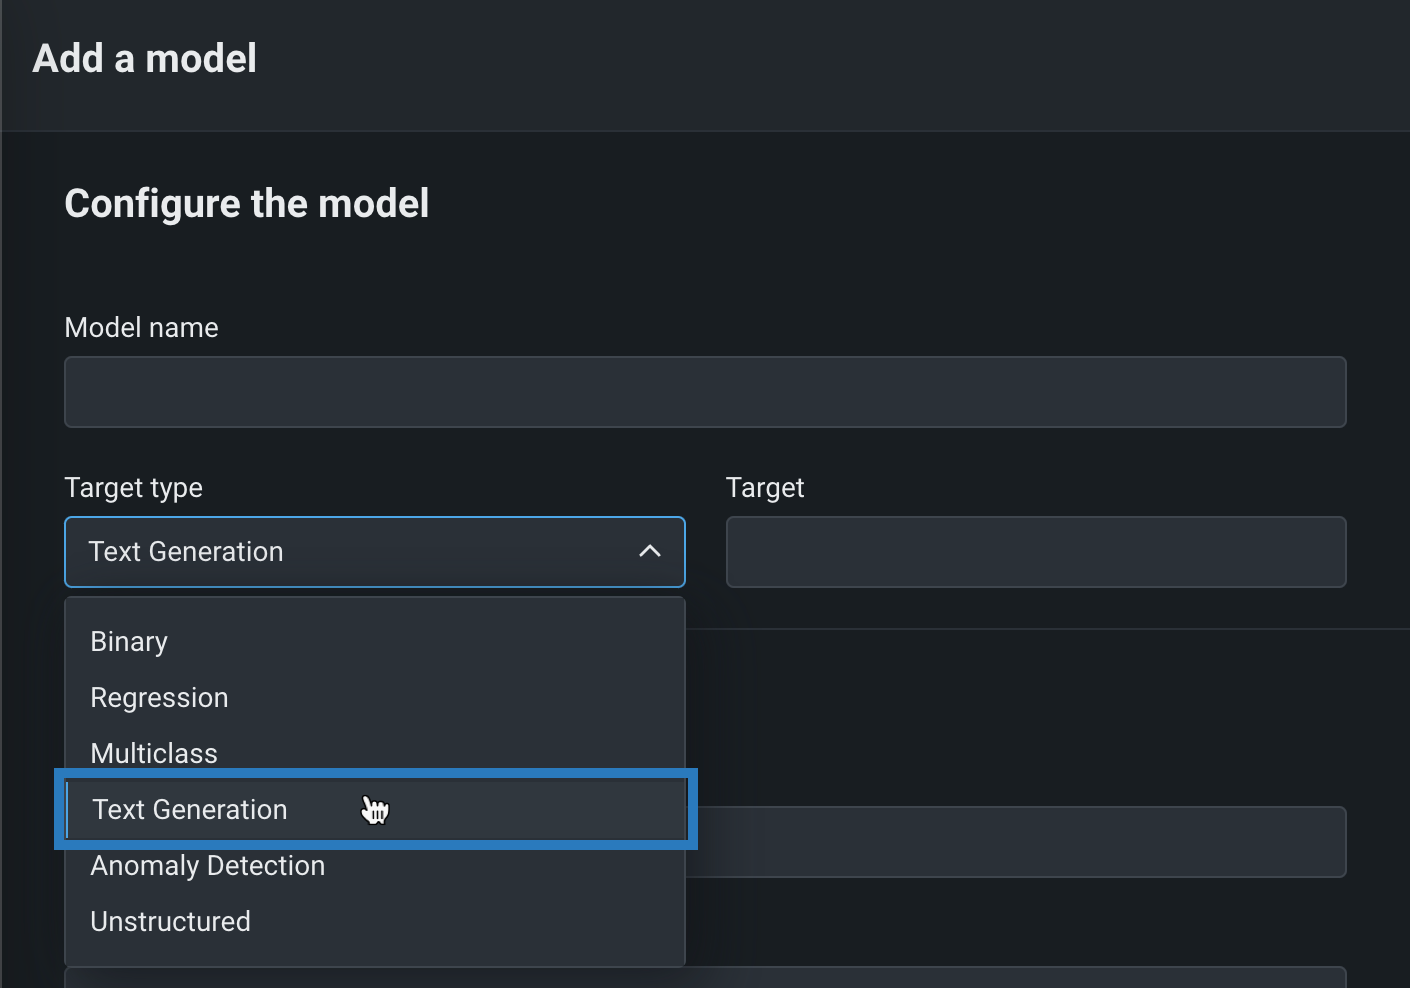
Field Description Model name Enter a descriptive name for the custom model. Target type Select Text Generation. Target name Enter the name of the dataset column that contains the generative AI model's output, for example resultText.Advanced configuration Language Enter the programming language used to build the generative AI model. Description Enter a description of the model's contents and purpose. -
After completing the fields, click Add model.
The custom model opens to the Assemble tab.
Assemble and deploy a generative custom model
To assemble, test, and deploy a generative model from the Model workshop:
-
At the top of the Assemble tab, under Environment, select a GenAI model environment from the Base environment list. The model environment is used for testing the custom model and deploying the registered custom model.
-
To populate the Dependencies section, you can upload a
requirements.txtfile in the Files section, allowing DataRobot to build the optimal image. -
In the Files section, add the required custom model files. If you aren't pairing the model with a drop-in environment, this includes the custom model environment requirements and a
start_server.shfile. You can add files in several ways: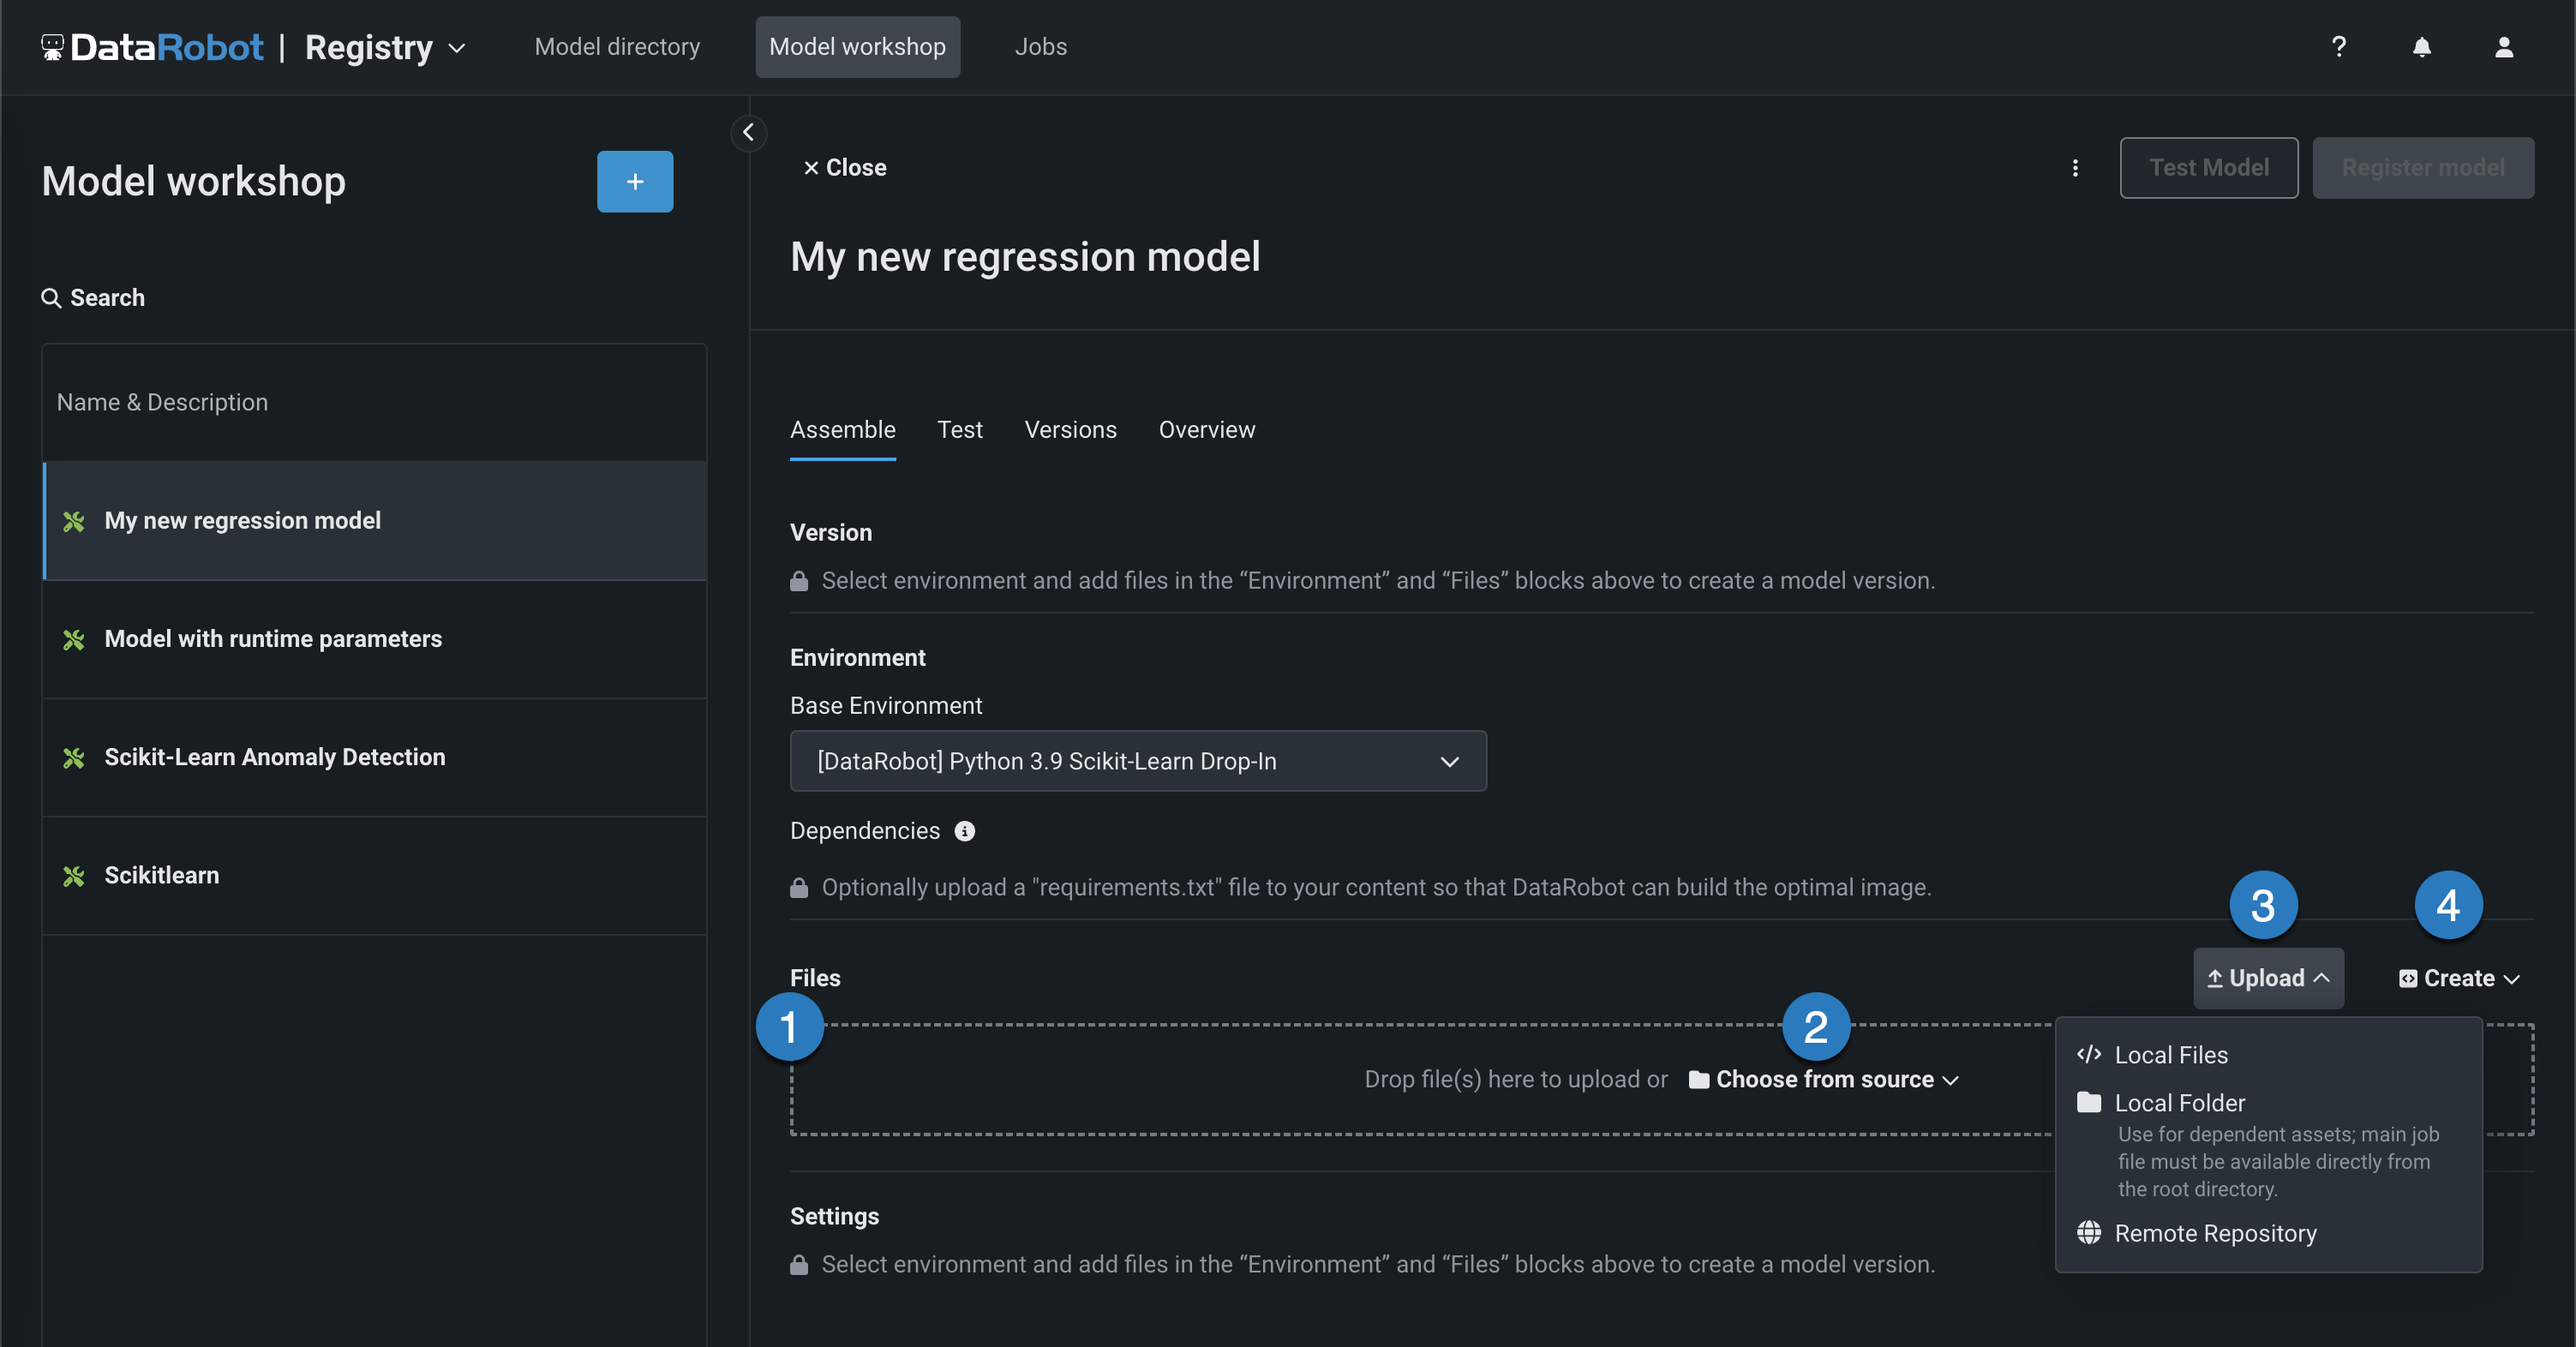
Element Description 1 Files Drag files into the group box for upload. 2 Choose from source Click to browse for Local Files or a Local Folder. 3 Upload Click to browse for Local Files or a Local Folder or to pull files from a remote repository. 4 Create Create a new file, empty or as a template, and save it to the custom model: - Create model-metadata.yaml: Creates a basic, editable example of a runtime parameters file.
- Create blank file: Creates an empty file. Click the edit icon () next to Untitled to provide a file name and extension, then add your custom contents.
A basic LLM assembled in the model workshop should, at minimum, include the following files:
File Contents custom.pyThe custom model code, calling the LLM service's API through public network access for custom models. model-metadata.yamlThe custom model metadata and runtime parameters required by the generative model. requirements.txtThe libraries (and versions) required by the generative model. -
After you add the required model files, add training data. To provide a training baseline for drift monitoring, upload a dataset containing at least 20 rows of prompts and responses relevant to the topic your generative model is intended to answer questions about. These prompts and responses can be taken from documentation, manually created, or generated.
-
Next, click the Test tab, click Run new test, and then click Run to start the Startup and Prediction error tests—the only tests supported for the Text Generation target type.
-
Click Register model, provide the model information, and click Register model.
The registered model opens in the Models directory tab.
-
In the registered model version header, click Deploy, and then configure the deployment settings.
You can now make predictions as you would with any other DataRobot model.
Create and deploy an external generative model
External model packages allow you to register and deploy external generative models. You can use the monitoring agent to access MLOps monitoring capabilities with these model types.
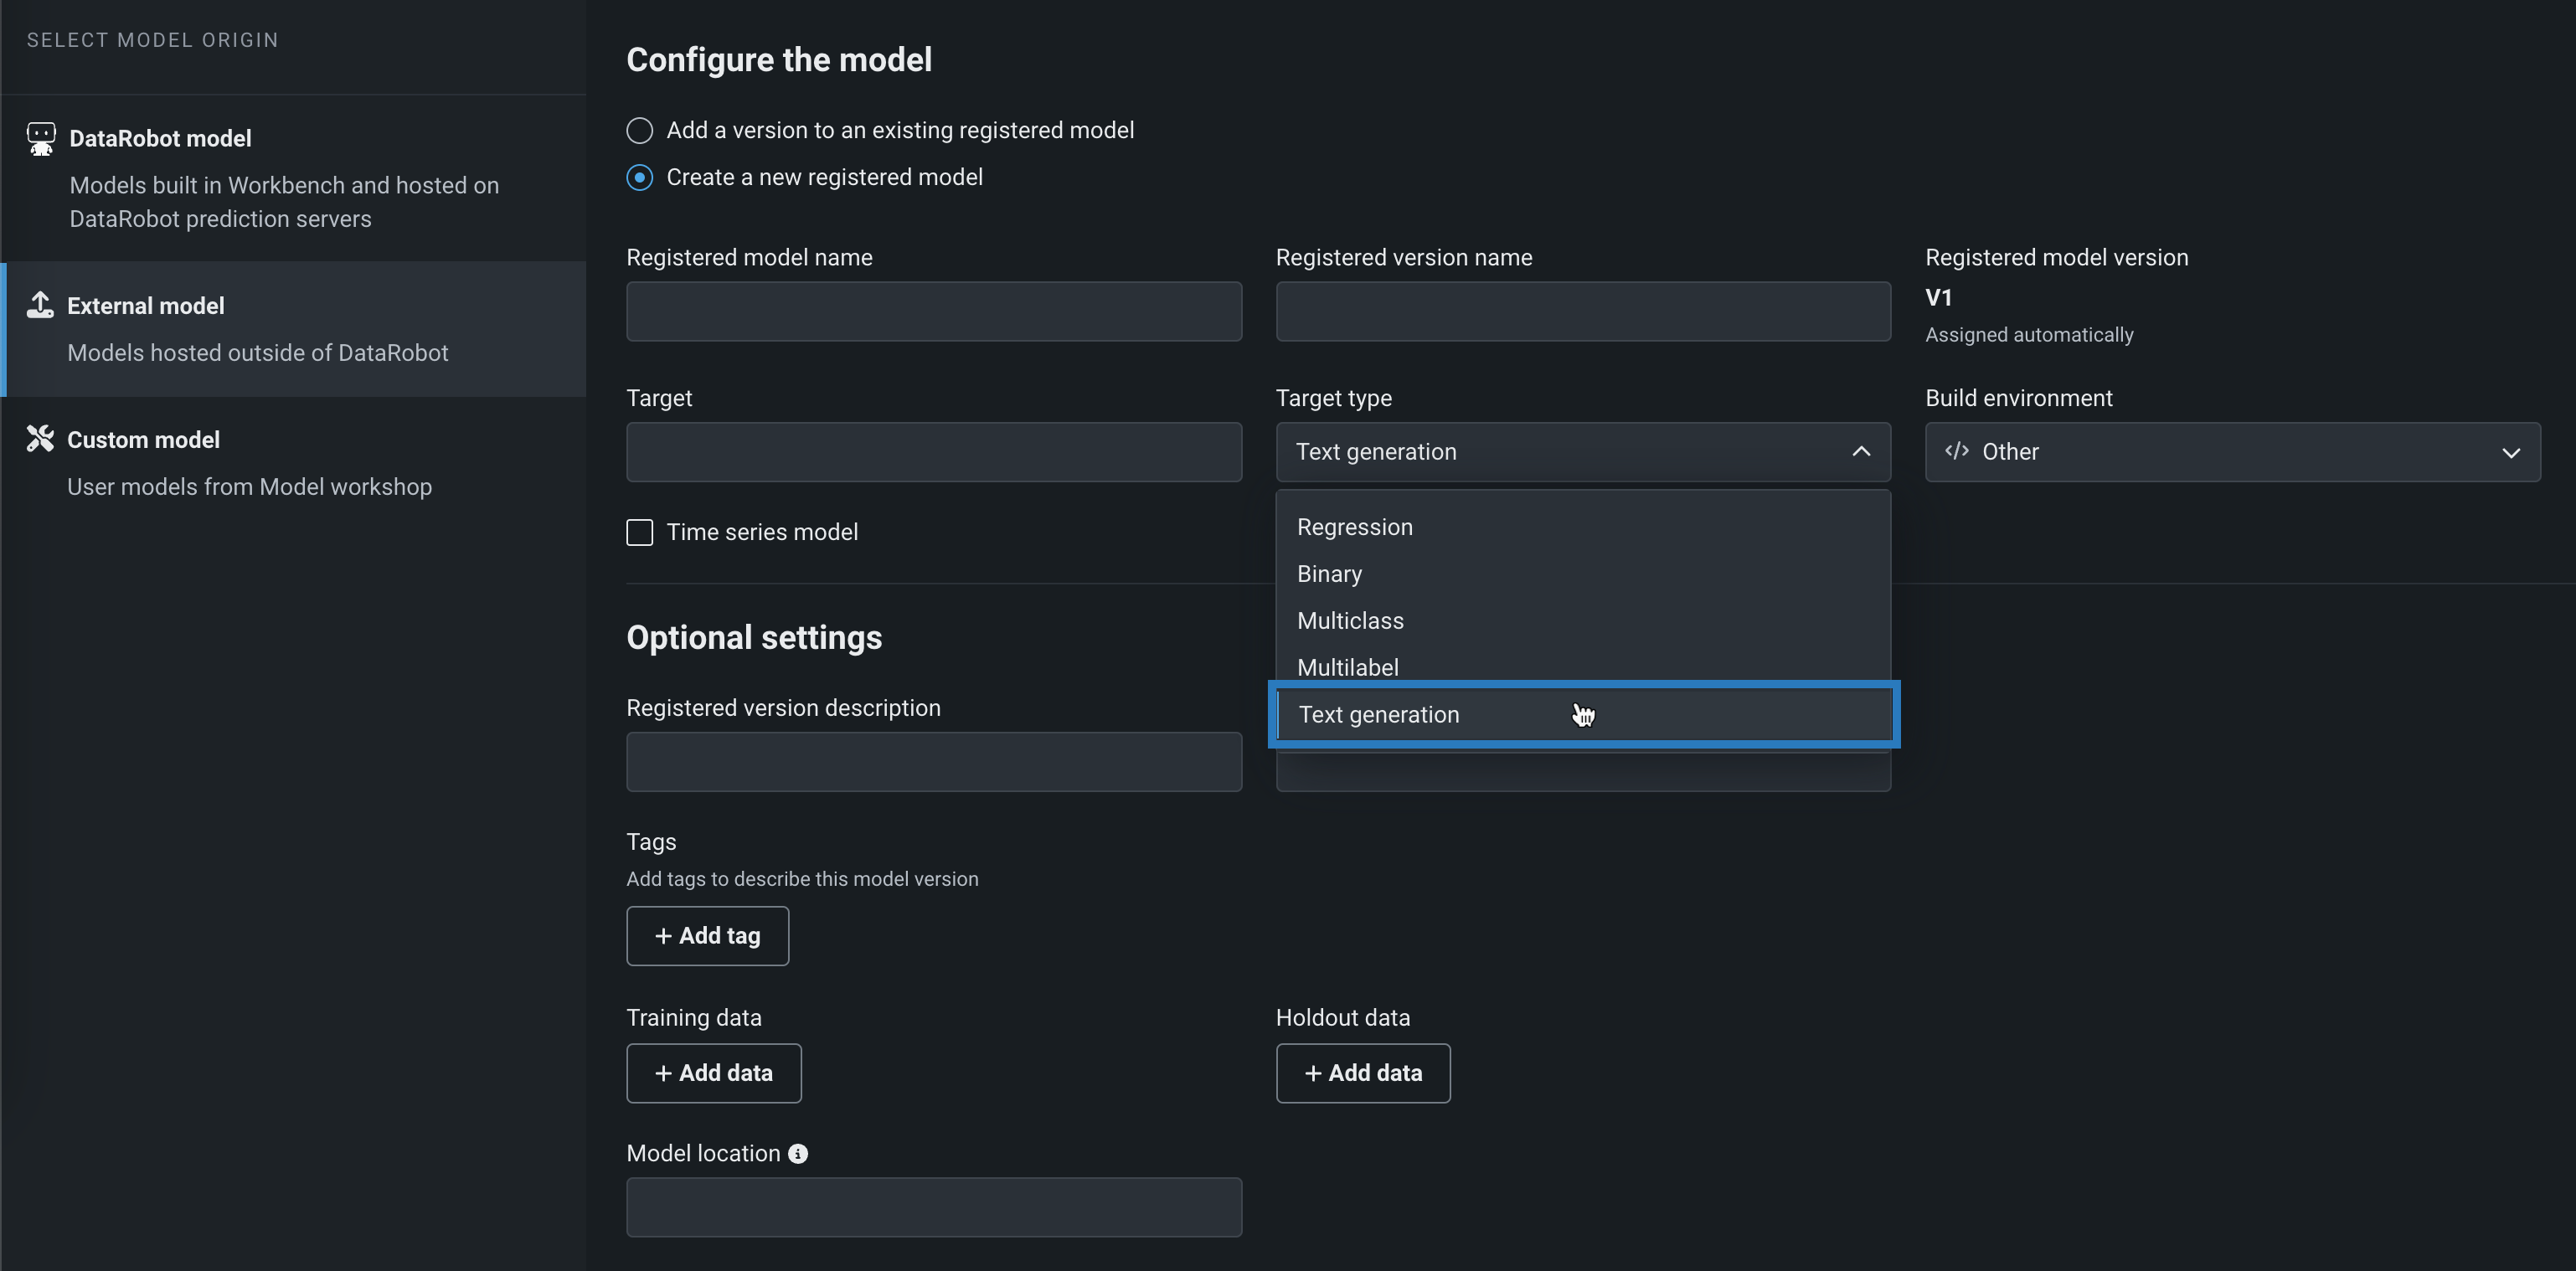
To create and deploy an external generative model monitored by the monitoring agent, add an external model as a registered model or version through the Registry:
-
In the Registry, on the Model directory tab, click + Register model (or the button when the registered model or version info panel is open):
The Register a model panel opens to the External model tab.
-
On the External model tab, under Configure the model, select Add a version to an existing registered model or Create a new registered model.
-
From the Target type list, click Text generation and add the required information about the agent-monitored generative model.
-
In the Optional settings, provide a training baseline for drift monitoring. To do this, under Training data, click + Add data and upload a dataset containing at least 20 rows of prompts and responses relevant to the topic your generative model is intended to answer questions about. These prompts and responses can be taken from documentation, manually created, or generated.
-
Once you've configured all required fields, click Register model.
The model version opens on the Registry > Model directory page.
-
In the registered model version header, click Deploy, and then configure the deployment settings.
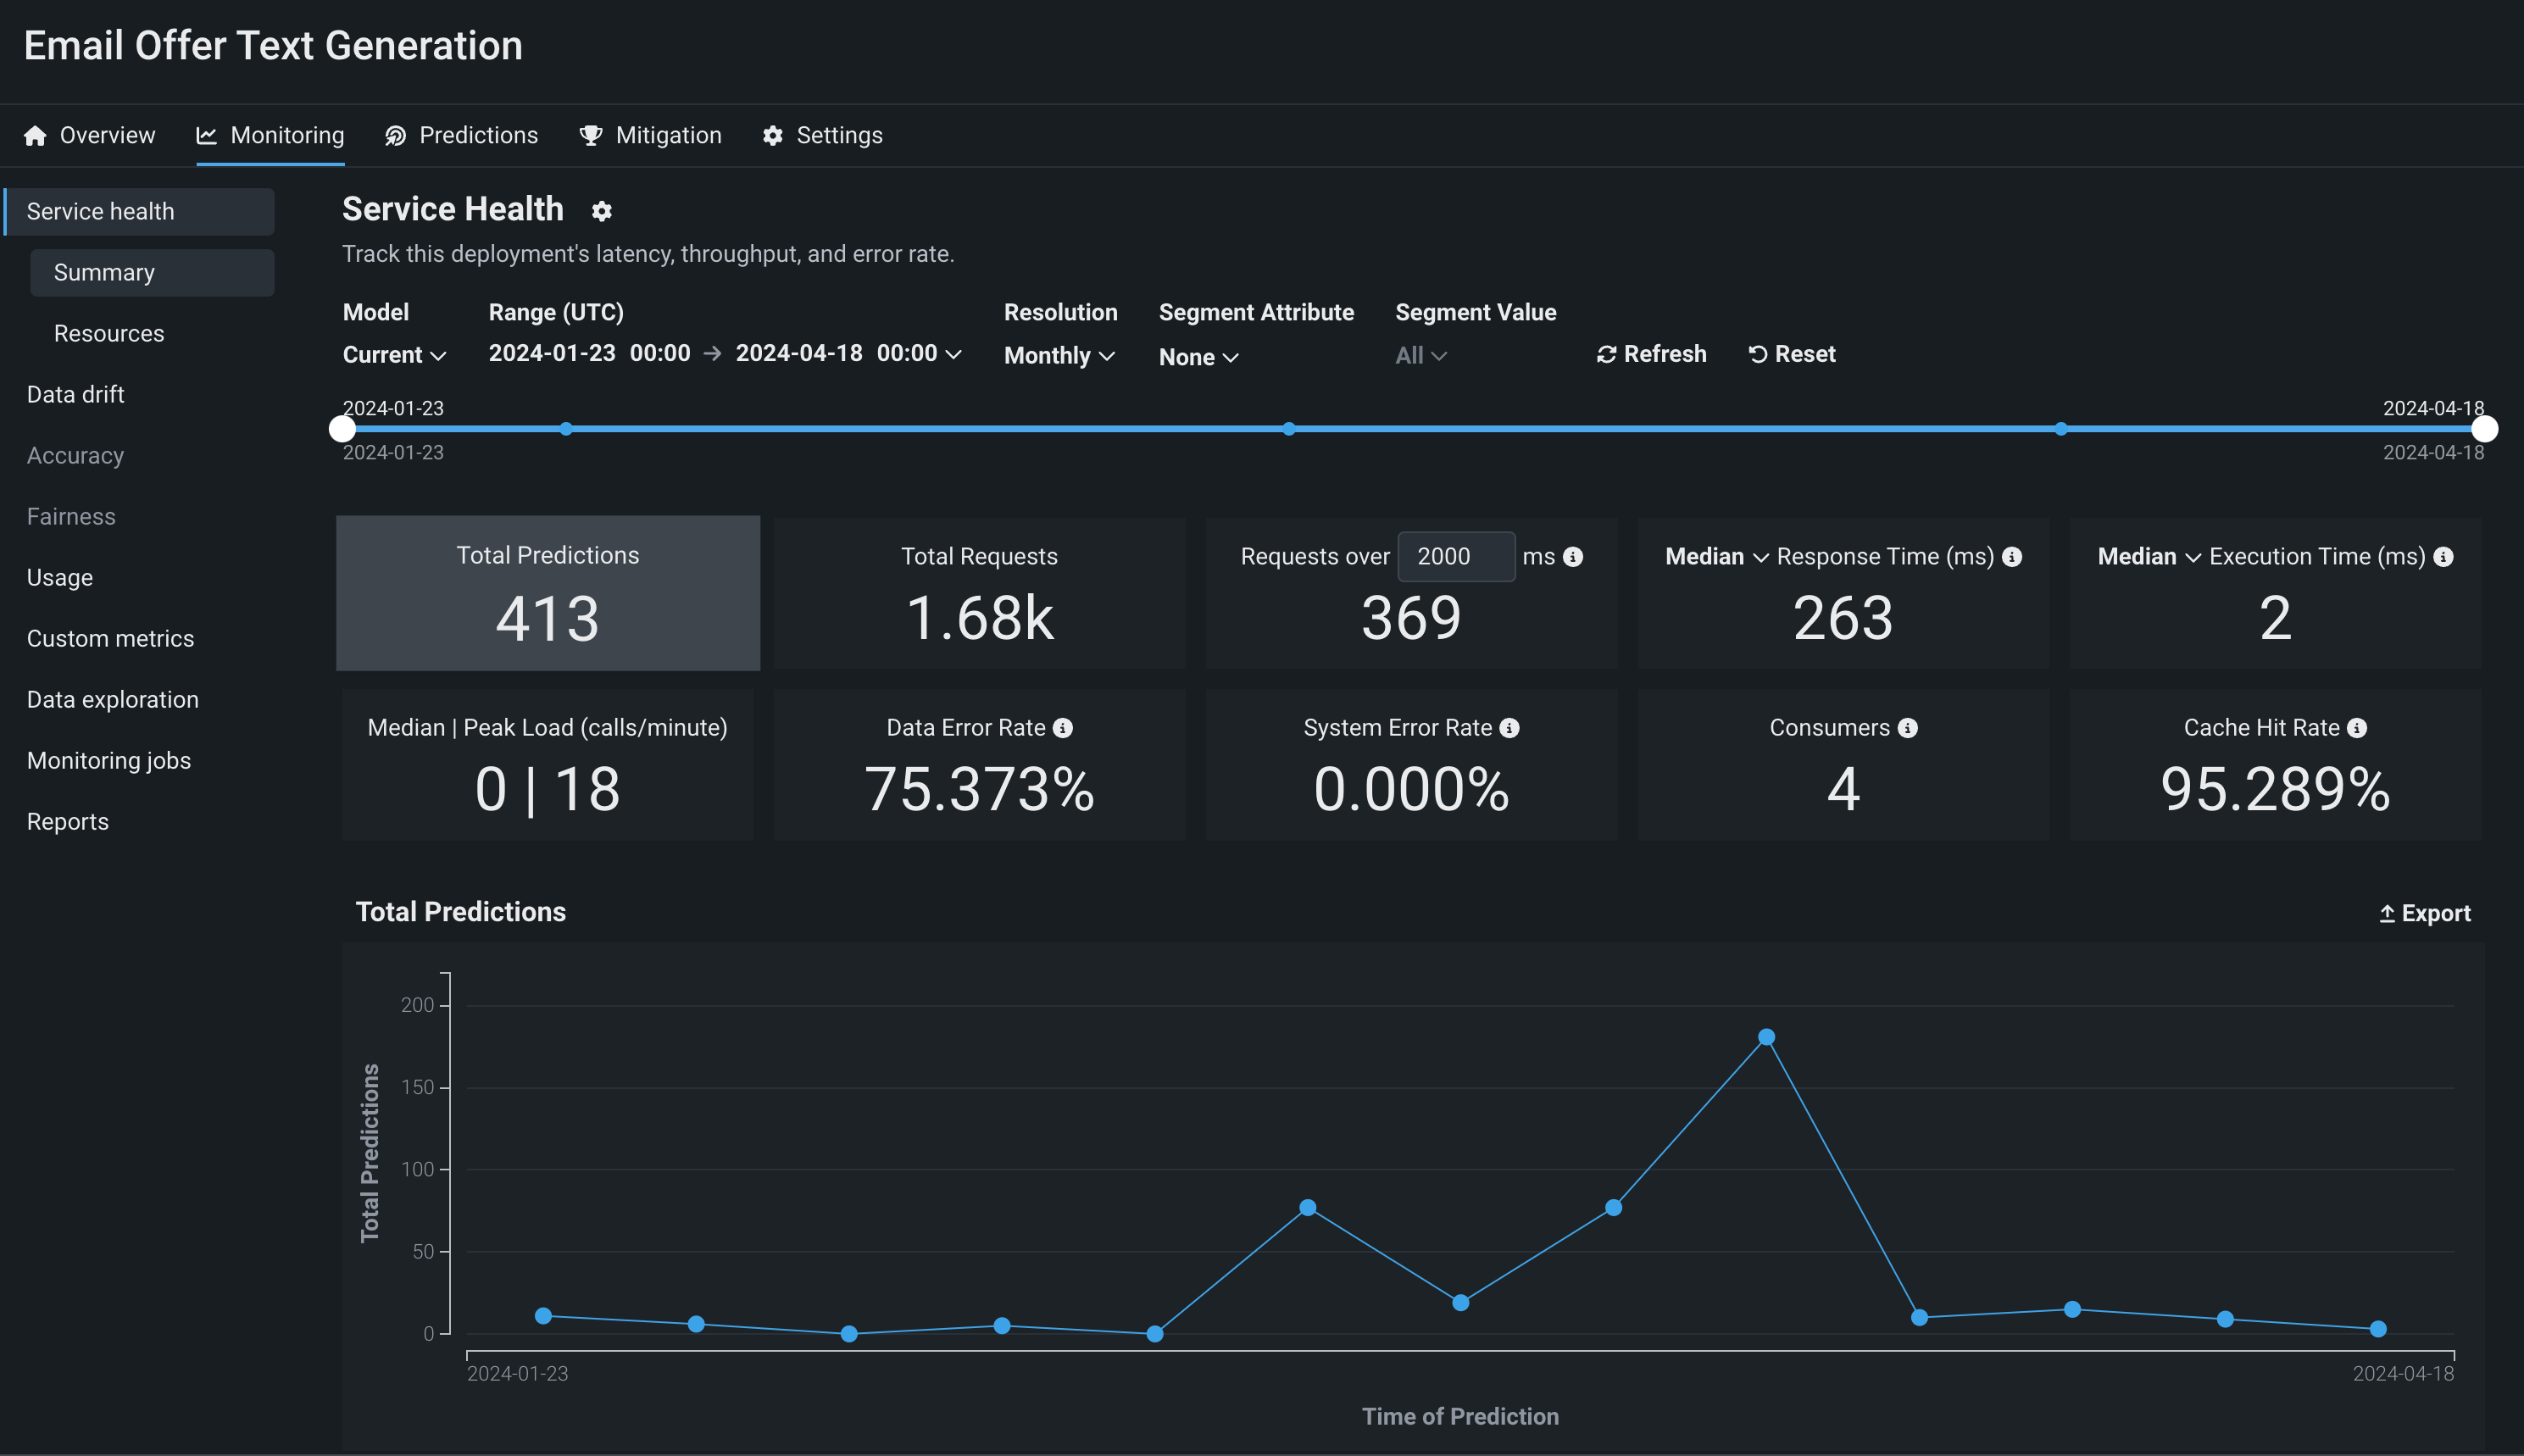
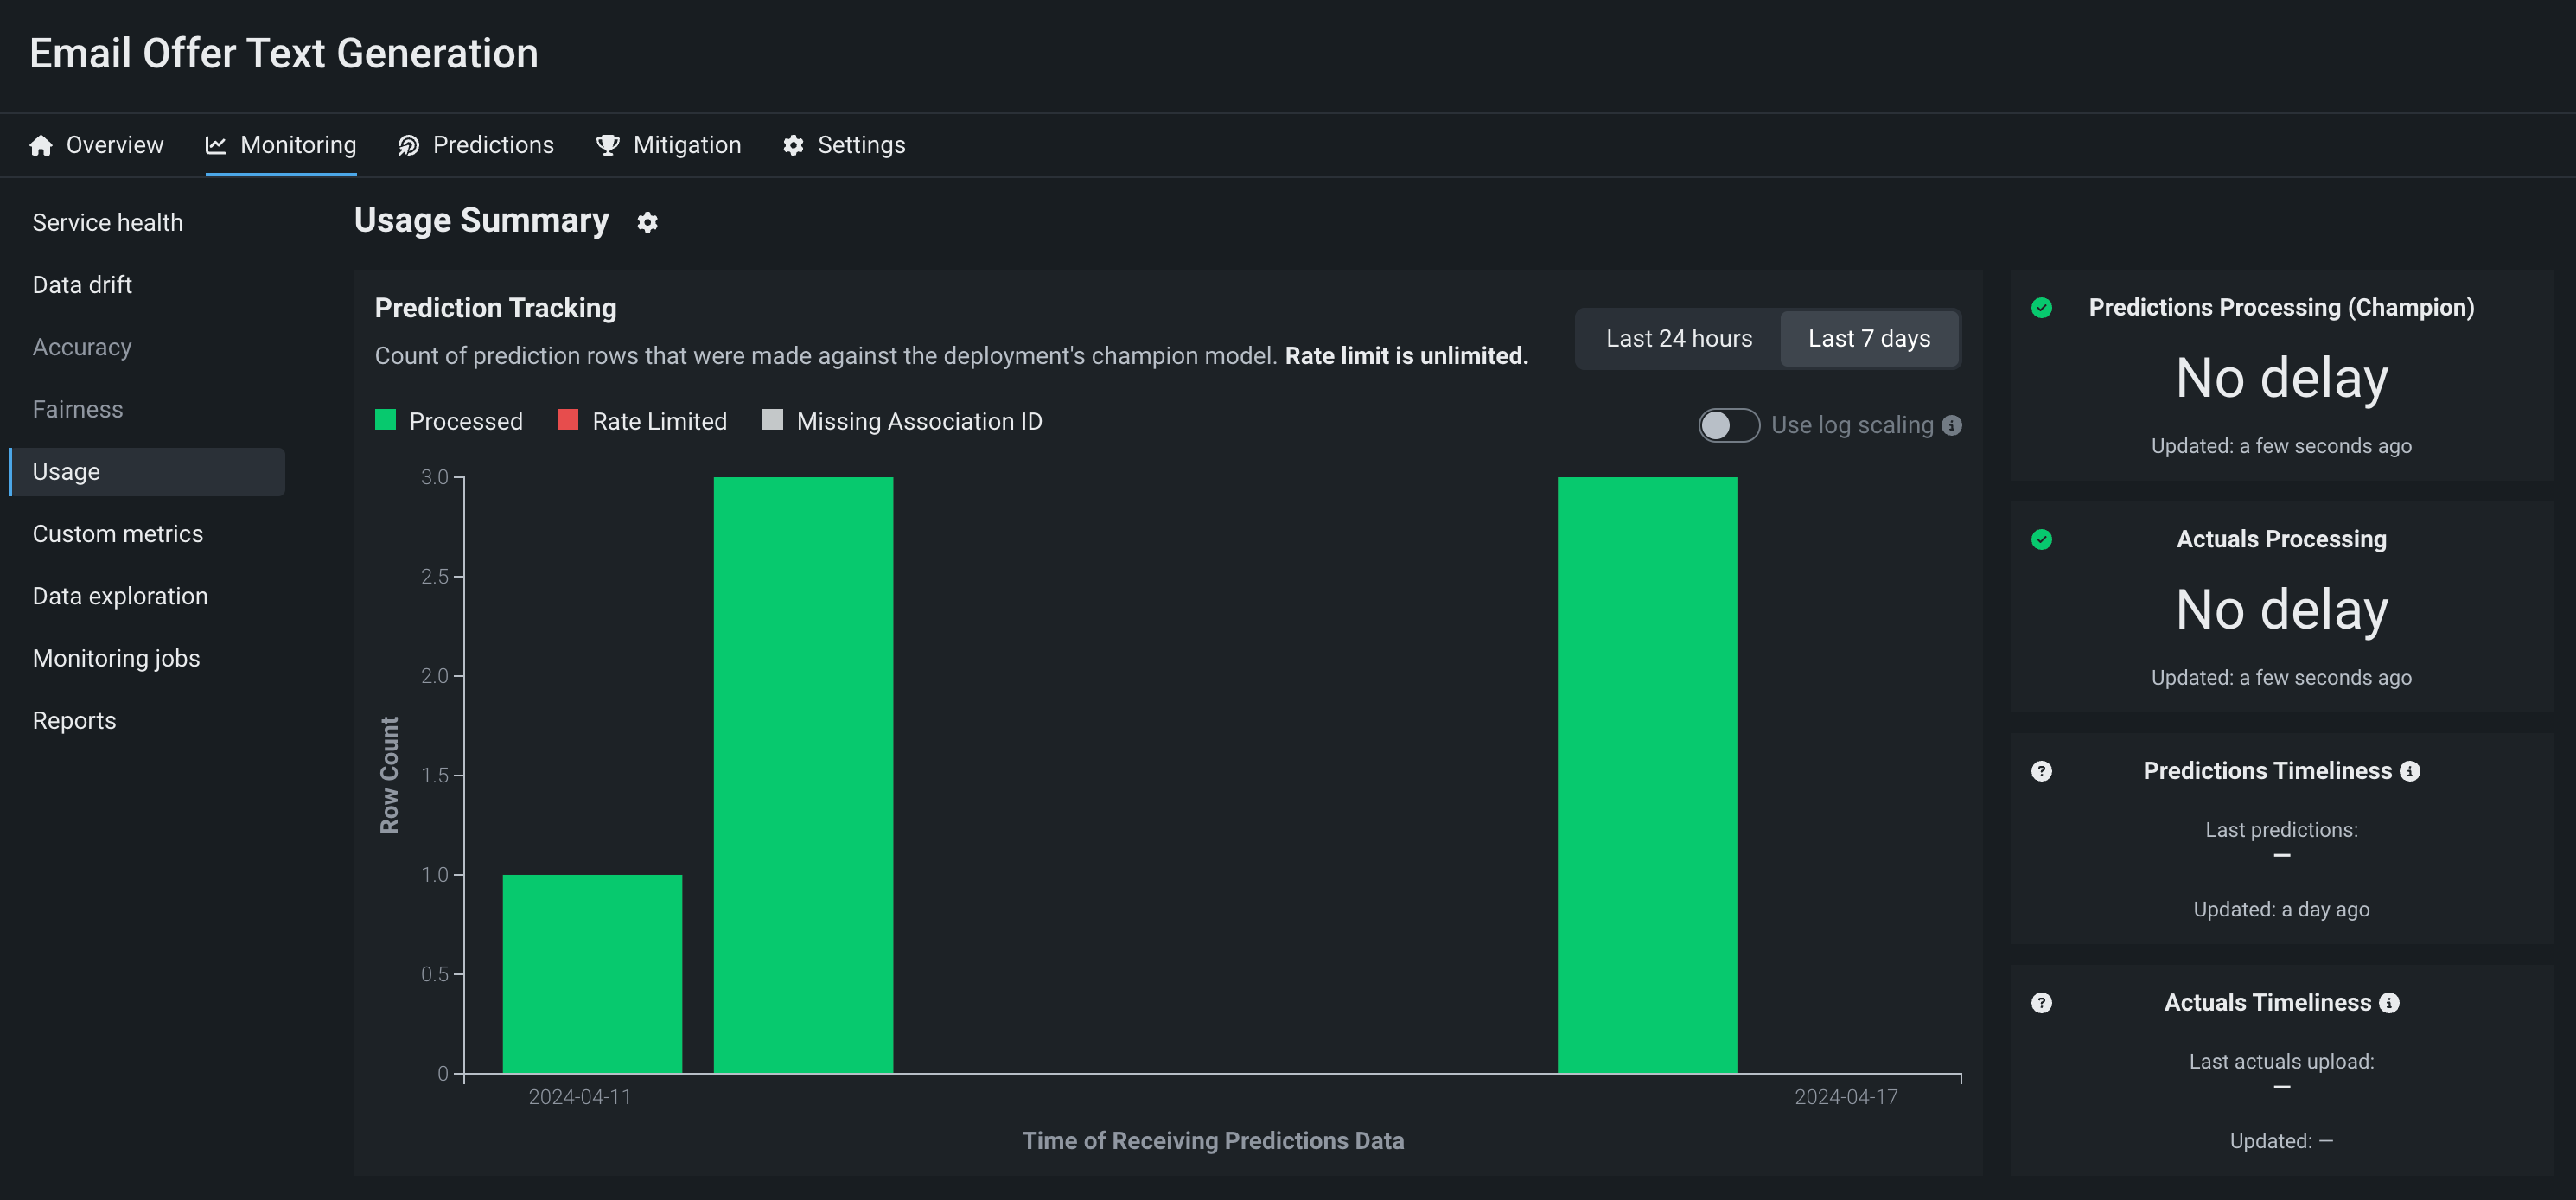
Monitor a deployed generative model
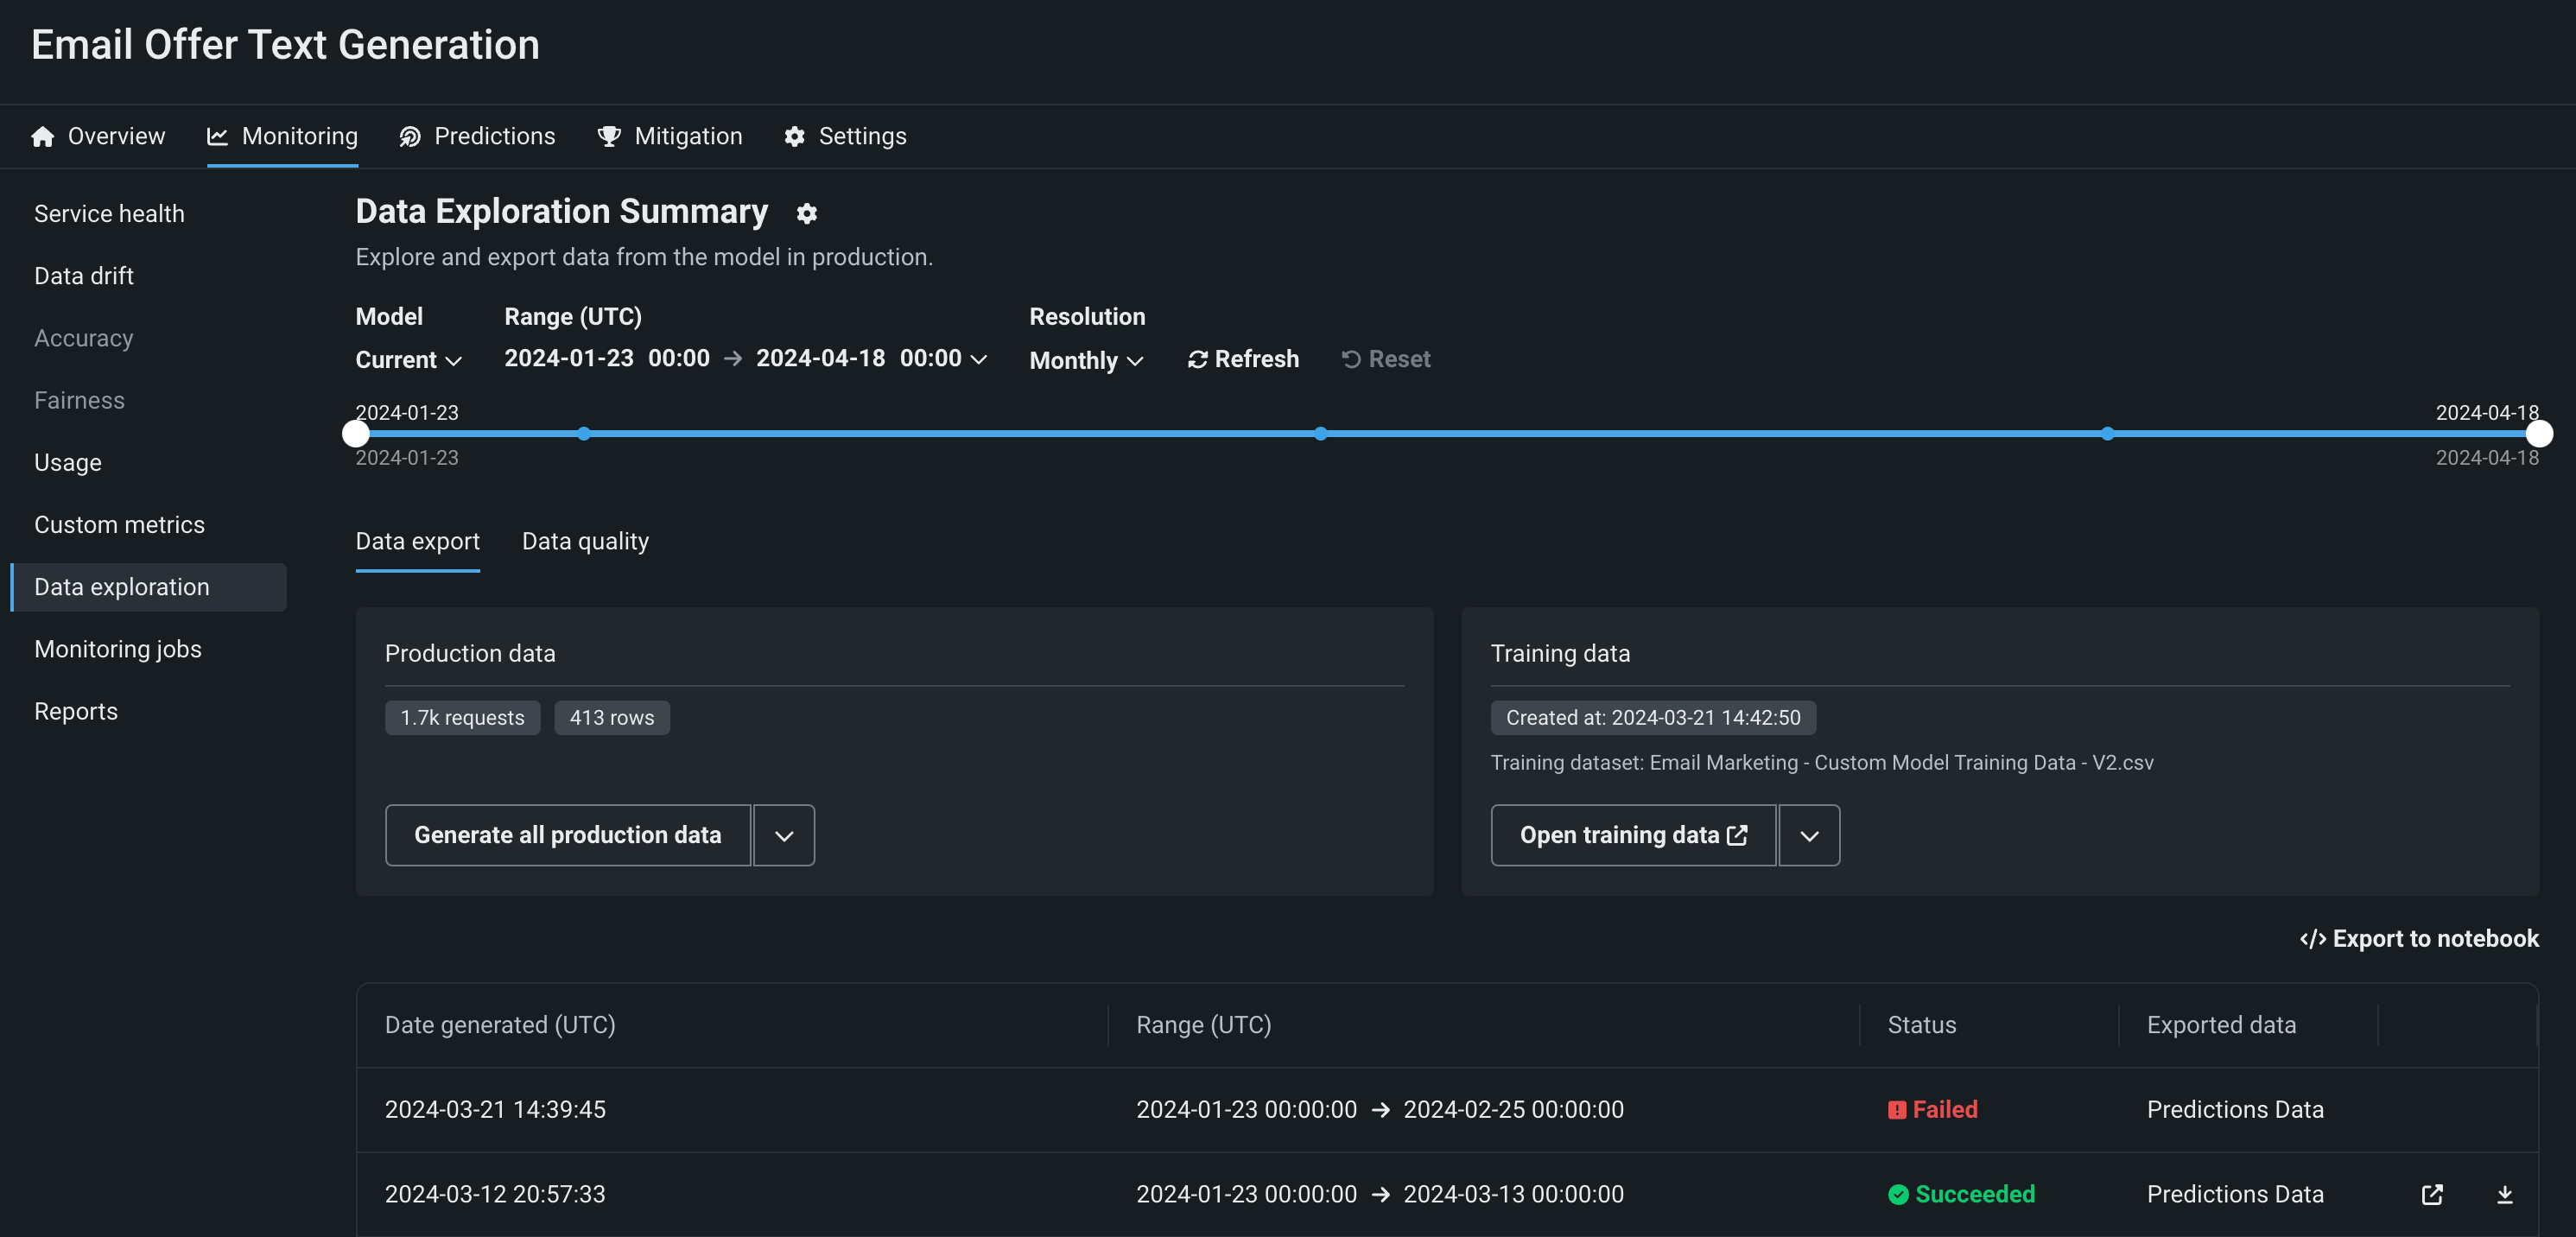
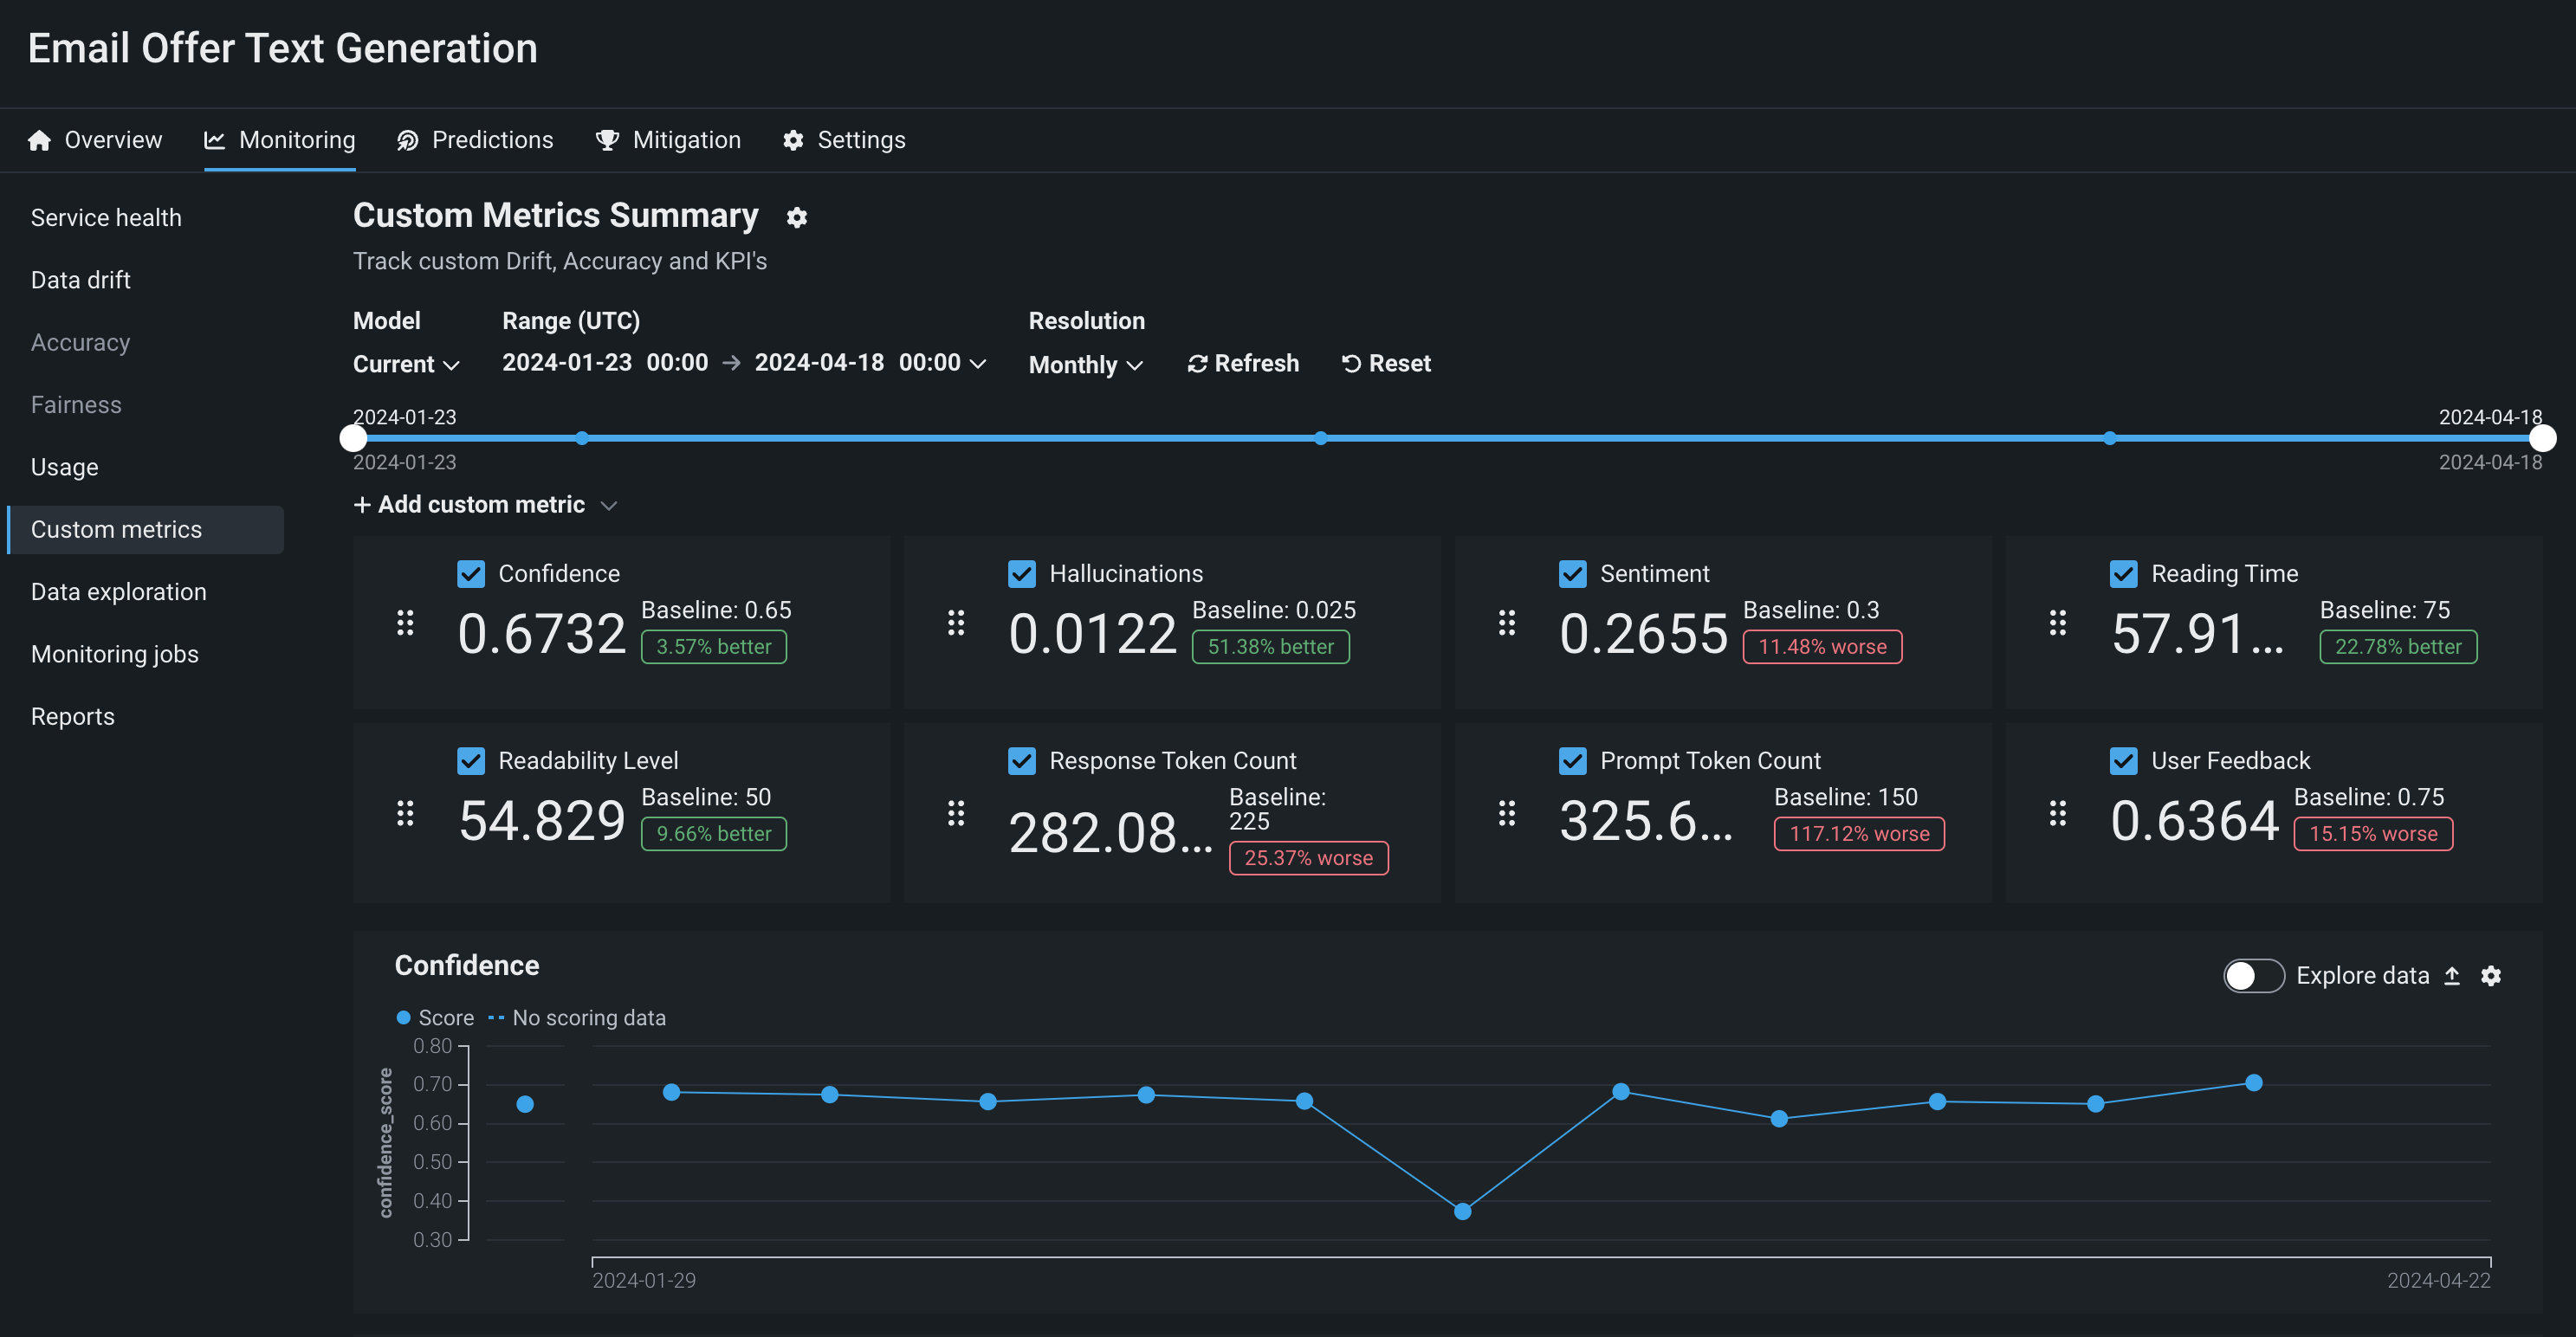
To monitor a generative model in production, you can view service health and usage statistics, explore deployment data, create custom metrics, and identify data drift.
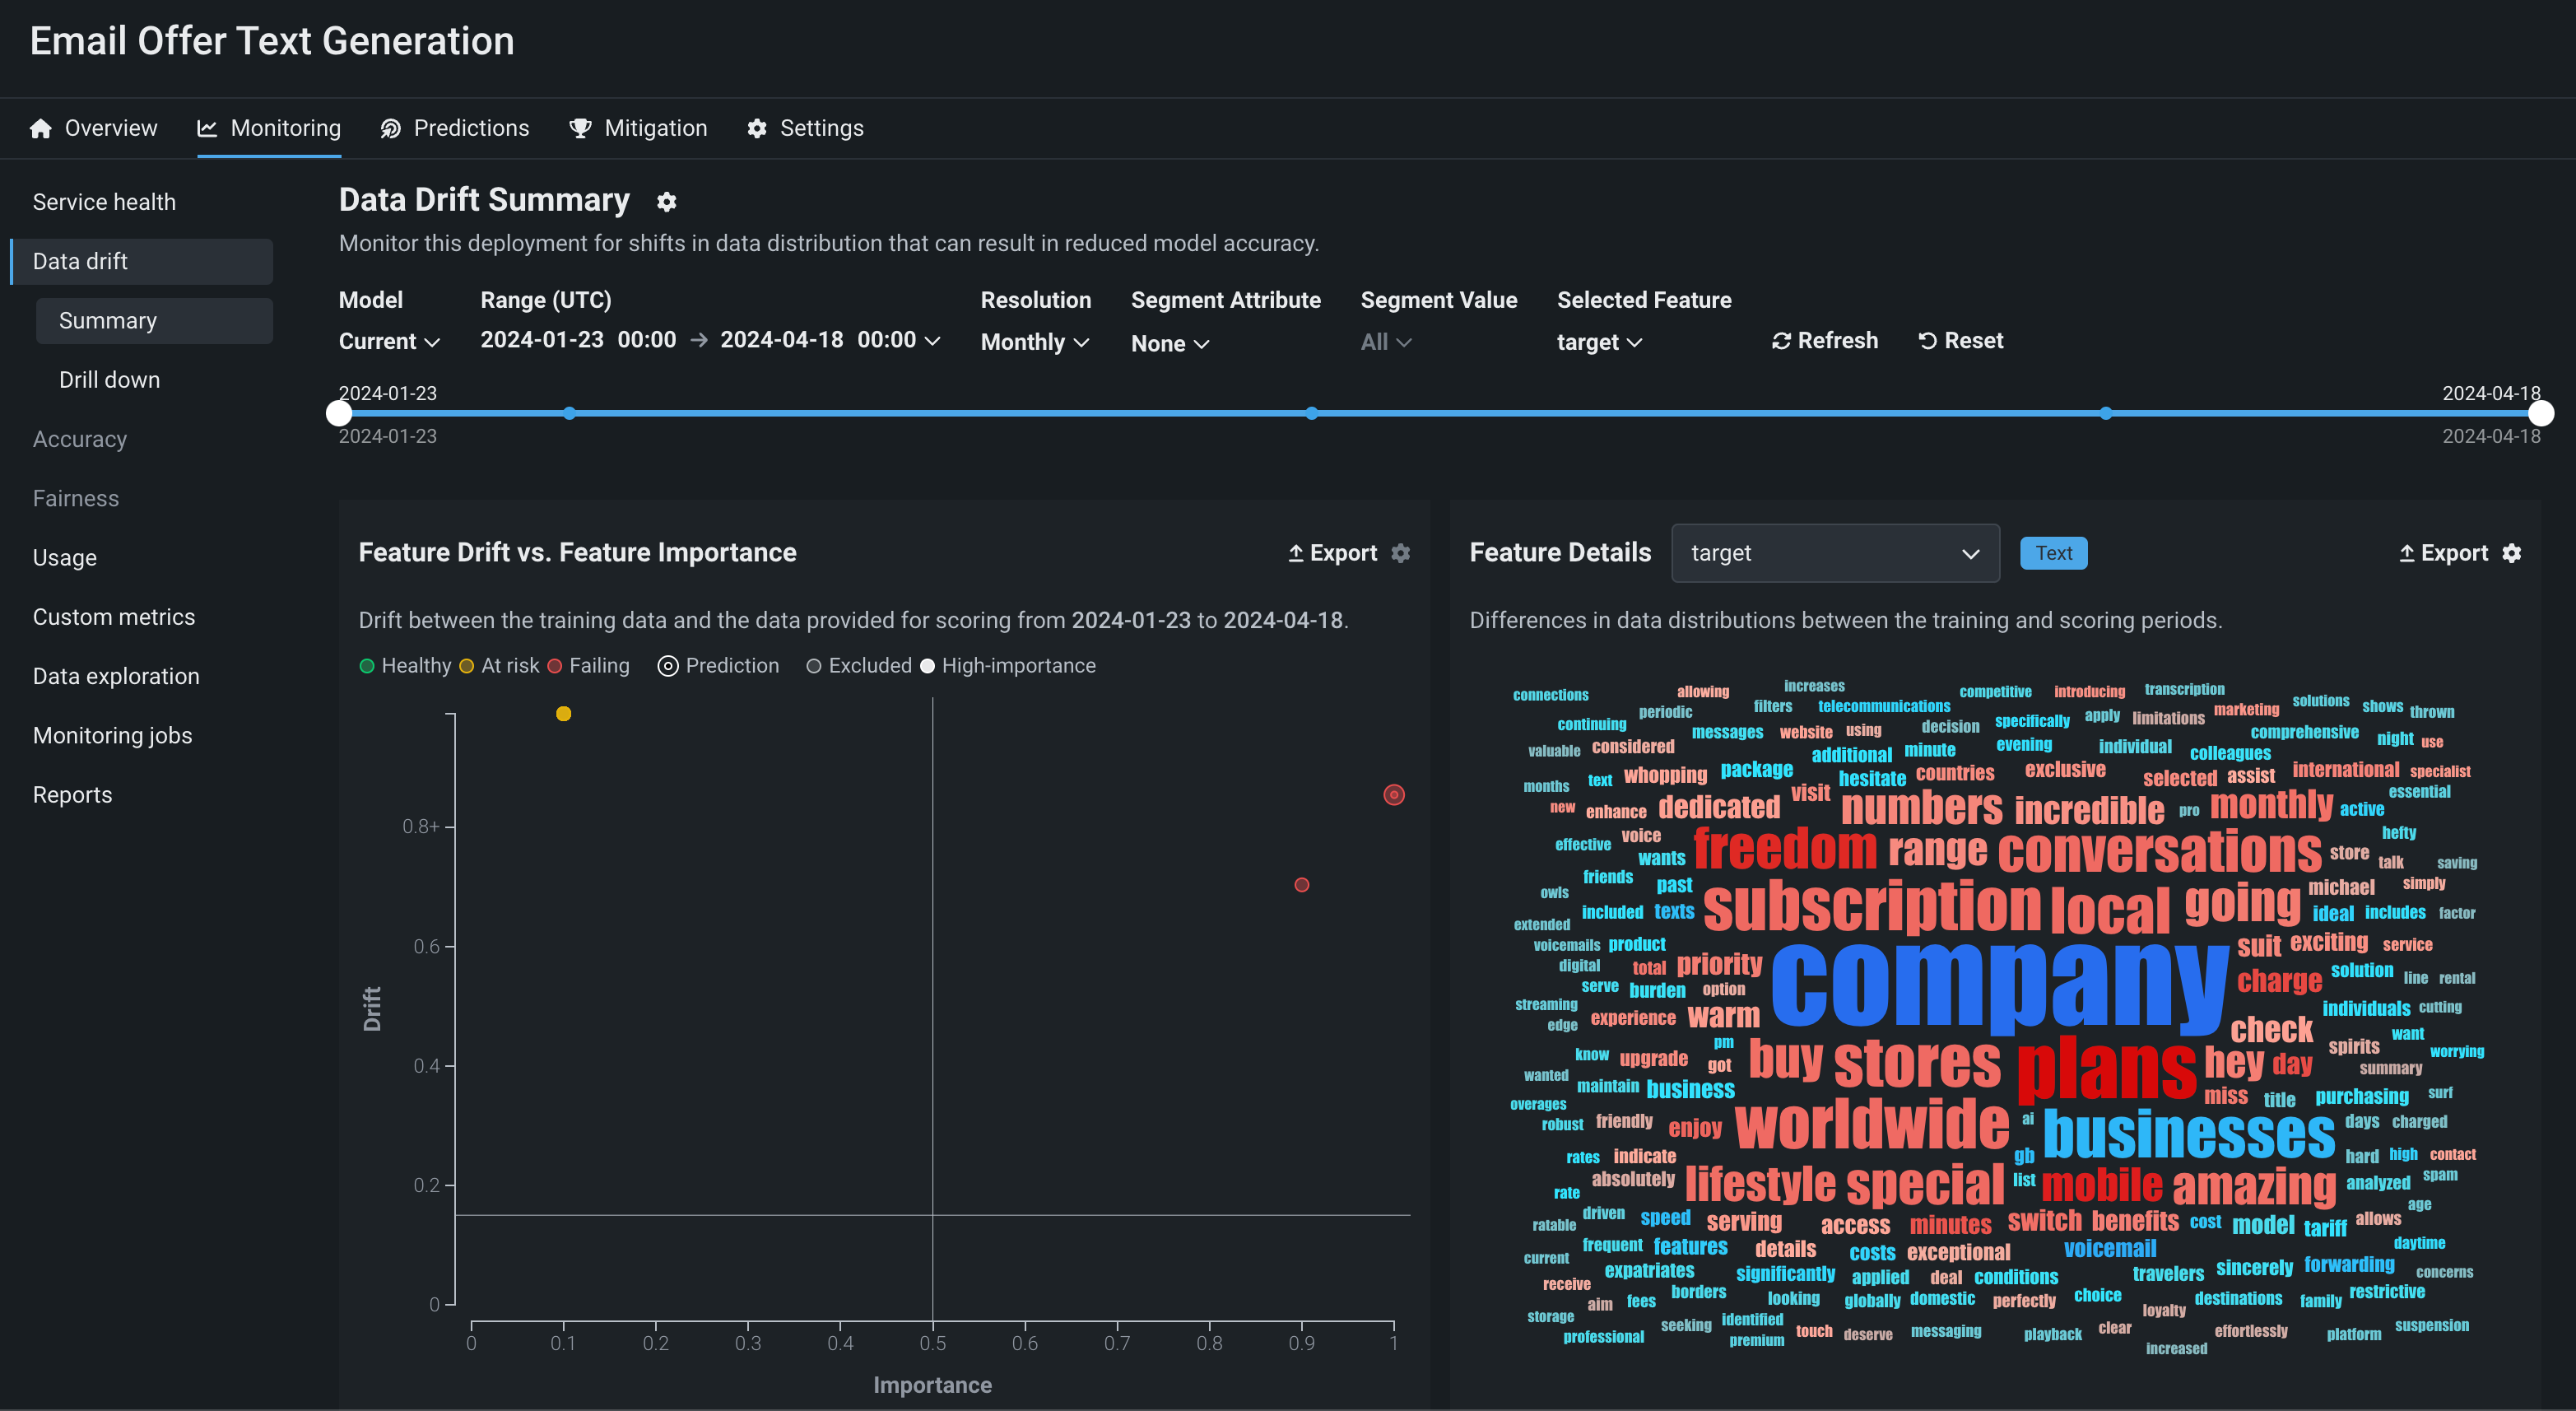
Data drift for generative models
To monitor drift in a generative model's prediction data, DataRobot compares new prompts and responses to the prompts and responses in the training data you uploaded during model creation. To provide an adequate training baseline for comparison, the uploaded training dataset should contain at least 20 rows of prompts and responses relevant to the topic your model is intended to answer questions about. These prompts and responses can be taken from documentation, manually created, or generated.
On the Monitoring > Data drift tab for a generative model, you can view the Feature Drift vs. Feature Importance, Feature Details, and Drift Over Time charts. In addition, the Drill down tab is available for generative models. To learn how to adjust the Data drift dashboard to focus on a specific model, time period, or feature, see the Configure the Data Drift dashboard documentation.
Feature details for generative models
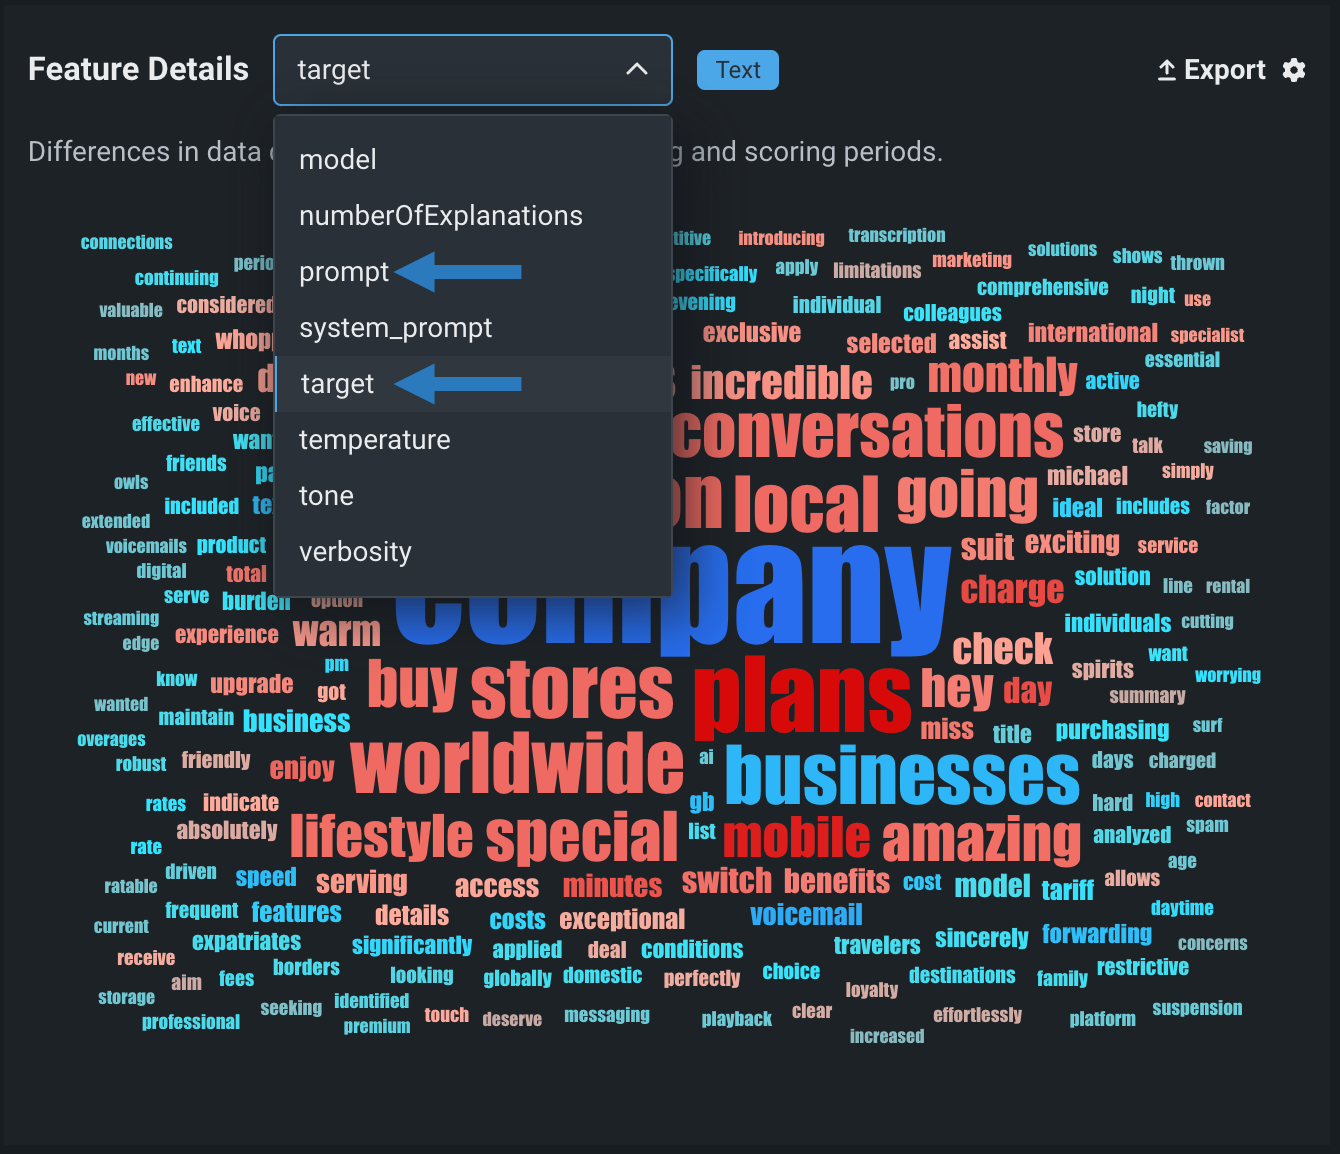
The Feature Details chart includes new functionality for text generation models, providing a word cloud visualizing differences in the data distribution for each token in the dataset between the training and scoring periods. By default, the Feature Details chart includes information about the question (or prompt) and answer (or target, model completion, output, or response). These are Text features, and in the example below, the question feature is prompt and the answer feature is target:
| Feature | Description |
|---|---|
| prompt | A word cloud visualizing the difference in data distribution for each user prompt or question token between the training and scoring periods and revealing how much each token contributes to data drift in the user prompt data. |
| target | A word cloud visualizing the difference in data distribution for each model output or answer token between the training and scoring periods and revealing how much each token contributes to data drift in the model output data. |
Features in the Feature Details chart
The feature names for the generative model's input and output depend on the feature names in your model's data; therefore, the prompt and target features in the example above will be replaced by the names of the input and output columns in your model's data. You can view these feature names in the Target and Prompt column name fields on the Overview tab for a generative model.
You can also designate other features for data drift tracking; for example, you could decide to track the model's temperature, monitoring the level of creativity in the generative model's responses from high creativity (1) to low (0).
To interpret the feature drift word cloud for a text feature like prompt or target, hover over a user prompt or model output token to view the following details:
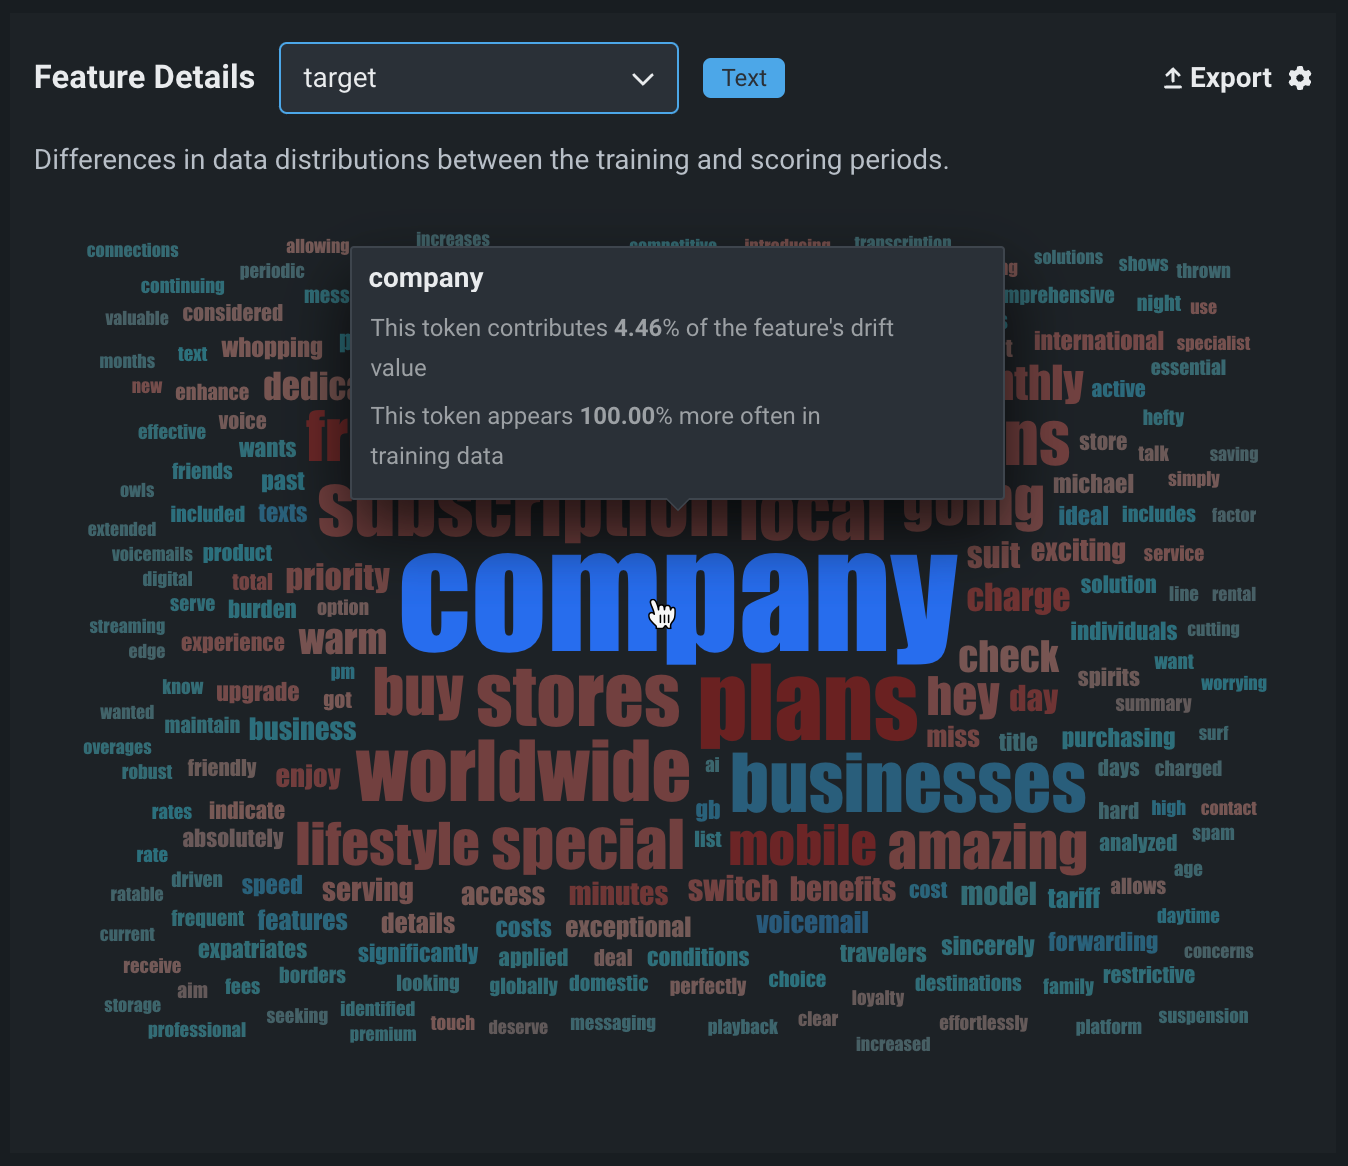
| Chart element | Description |
|---|---|
| Token | The tokenized text represented by the word in the word cloud. Text size represents the token's drift contribution and text color represents the dataset prevalence. Stop words are hidden from this chart. |
| Drift contribution | How much this particular token contributes to the feature's drift value, as reported in the Feature Drift vs. Feature Importance chart. |
| Data distribution | How much more often this particular token appears in the training data or the predictions data.
|
Tip
When your pointer is over the word cloud, you can scroll up to zoom in and view the text of smaller tokens.